

Products
Database Search Solution (New Version) Search Control SEO Pager Highlighter Shortcut Controls Crypt Package Free ASP.NET Controls
Geotargeting Component ASP.NET Media Player Control Flash Video Player Control Services
ASP.NET Telecommute Jobs Free IP Location Lookup Test .Net Regular Expressions CSS/Table/DIV Page Layouts Custom Programming Article Sites Master List |
Interoperating With COM from .NET applications (COM Interop)IntroductionComponent Object Model (COM) is a technology aims to sharing binary code across different applications with different programming languages. A COM component (.DLL or .EXE) is a binary code that could be called from your application whatever the used programming language in component creation or component calling process. COM provides the concept of reusing in its widest form. You may think that the idea is not new. Yes, you are right, any object oriented programming language has the concept of reusing but it is a reusing on the source code and the same programming language level. You may think of DLLs as another form of reusability and this time at the binary code level. This is right but what about the programming language limit. Although DLLs introduce code sharing at binary level, they are written mainly to a C interface, they can only be used by C or languages that understand C calling convention. MFC is another form of reusing, code sharing at binary level but with the programming language barrier. You can only use MFC library from within MFC applications. As you see the above ways of code sharing suffer from limitations on the used programming language. COM comes to solve all these problems. COM works at the binary code sharing level and do not suffer from programming language limitations. You can build a COM component using any programming language you want, and you can call or use COM component from within any programming language you want. COM does this by defining binary standards and structures followed by all developers who want to create COM components. COM is introduced by Microsoft in 1993. Since that date the term COM is used as an umbrella term that encompasses the OLE, OLE Automation, Active X, COM+, and DCOM technologies. A large library of COM components are developed and used since that date. When Microsoft recently introduced its new .NET framework with the new concept of managed and unmanaged code, all the legacy COM components became in one minute obsolete, unmanaged, and not following the new .NET standards. What should we do with all that wealth of COM components? Should we threw it away and start from the beginning?! Fortunately Microsoft answered the above question and said no, you shouldn't threw all this away instead you can use it from within the new managed .NET code by using what it calls "COM Interop". This tutorial aims to show you how to call a COM component (unmanaged code) from within a .NET application (managed code) using the COM interop technique. Callable WrappersAs you may know, managed code has access to all the services the CLR (Common Language Runtime) brings to the table, such as security and versioning support, garbage collection, and cross-language integration. Managed components depend on the CLR and expect other components with which they interact to depend on the CLR as well. But, the unmanaged components can not be recognized in the CLR environment. So, when you need to build managed code along with unmanaged one in the same application you will need to use some kind of proxy. In general, a proxy is a piece of software that takes commands from a component, modifies them, and forwards them to another component. The proxy used in calling unmanaged code form managed code is called Runtime-Callable Wrapper, or RCW. When you call an unmanaged code from within a managed code, the runtime generates a wrapper to overcome the differences between the two programming models and provides a seamlessly communication between them. Metadata Vs Type LibrariesCOM type definition resides in type libraries while .NET framework uses type metadata in assemblies. The two type definitions are quiet different. So, to be able to use COM component from within a .NET application we need to convert the type libraries to suitable type metadata. Note that COM type libraries can be stand-alone file (.tlb) or be embedded in the DLL or EXE file. There are four ways you can choose form to do the conversion task: Visual Studio .NET When you add a reference to a COM component (.DLL, .EXE) file or a type library (.tlb) file, Visual Studio .NET generates an interop assembly containing the required metadata. You can do this simply by adding a new reference to your project, select the required COM or type library file from the COM tab in the add references dialog box. Then click ok and the conversion will be carried out. Type Library Importer (Tlbimp.exe) Type library importer (TLI) is a command line tool used to generate an interop assembly containing the metadata of a given COM type library. This tool is provided as part of the .NET framework Software Developer Kit (SDK). With TLI you can choose from many options (Type tlbimp /? to see all the options). The most important option is the "/out" which lets you specify a name for the resulting .NET assembly. The following command line converts a COM component "comp1.dll" to a matching .NET assembly named "NETcomp1.dll". tlbimp comp1.dll /out:NETcomp1.dll If your COM component is shared among multiple projects, it is useful to use the TLI so that you can sign the resulting assembly and place it in the Global Assembly Cache (GAC). Also TLI gives you a complete control over the generated assembly advanced details, such as its namespace or version number. TypeLibConverter Class In System.Runtime.InteropServices namespace. This class provides services to convert a COM type library to a managed assembly just like the TLI do. It can also convert an in-memory type library to metadata. Custom Wrappers This option is used when you have a corrupted type library or have no type library at all. The solution in this case is to create a duplicate definition of the class or interface in managed code. Then compile the source code to generate metadata in an assembly. In this case we say that you define the COM type manually and this is the less desirable option. It requires experience with COM coclasses and interfaces along with type library conversion rules. COM From .NETOnce the conversion process above is done you are ready to create COM types, activate instances, and call methods and properties of the COM object. To take a real example showing this process, we choose a Microsoft Active X control called "MS Chart" control. This control aims to draw charts that display data inside your application form. For complete documentation about this chart properties and methods click here. This control has a display so it can be added to the toolbox to be used in various applications such as any other controls on the toolbox. Also, this control is shipped with the Microsoft Office so it is installed on your system by default at your windows directory. Now open up your Visual Studio 2005. Create a new Visual Basic project. Right click the toolbox and select "Choose Items ...". From the "Choose Toolbox Items" dialog box select the "COM Components" tab. Browse the components and check "Microsoft Chart Control 6.0 (SP4) (OLEDB)" component, then click "OK". When you do this the conversion process will be carried out and a reference to this control will be added to your application. If you now browse the "Debug" folder of your project you will find the new converted DLL file. Now, the chart component is appeared at bottom of your toolbox. Select it and add it to the "Form1" design area. Change its "name" from the "Properties" window to "MyChart". Add a "Button" control to "Form1" as shown in the following figure. 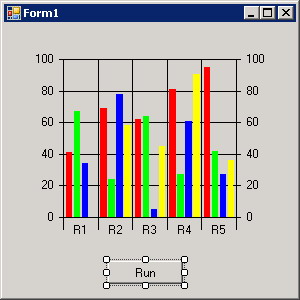 Figure 1 - Form1 design view Double click the button control to activate its click event handler and add the following lines of code. Private Sub Button1_Click(ByVal sender As System.Object, _ ByVal e As System.EventArgs) Handles Button1.Click Me.MyChart.TitleText = "ABCD Chart" Me.MyChart.FootnoteText = "Figure1" End Sub As you see, we call the "MyChart" properties from our code as simple as we call any other managed code. Run your application, click the button and enjoy results. 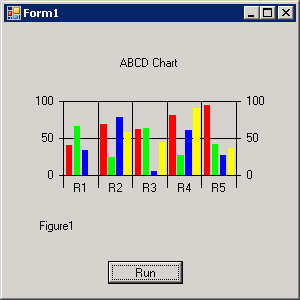 Figure 2 - Results of calling unmanaged ActiveX control properties from my .Net project To download the complete example click here. For further informationRefer to the online copy of Microsoft Developers Network at http://msdn.microsoft.com or use your own local copy of MSDN. Tutorial toolbar: Tell A Friend | Add to favorites | Feedback | comments powered by Disqus |