|
Products
Database Search Solution (New Version) Search Control SEO Pager Highlighter Shortcut Controls Crypt Package Free ASP.NET Controls
Geotargeting Component ASP.NET Media Player Control Flash Video Player Control Services
ASP.NET Telecommute Jobs Free IP Location Lookup Test .Net Regular Expressions CSS/Table/DIV Page Layouts Custom Programming Article Sites Master List |
Converting Black & White Image To Color ImageYou will find a lot of Tutorials for converting a color photo to a Black and White Photo. In this tutorial we will learn how to convert a Black and white photo to a color photo. Select a black and white image that you want to color. Create a new file and apply the following settings or you can choose your own width and height as per your requirement. The steps are rather simple, so you should not have trouble in understanding this tutorial. 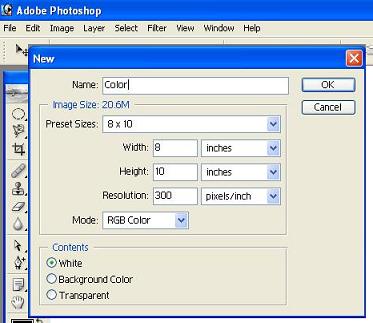 Create a new layer. Select the Move tool Click on the Image and then drag the Black and white image to your blank layer. 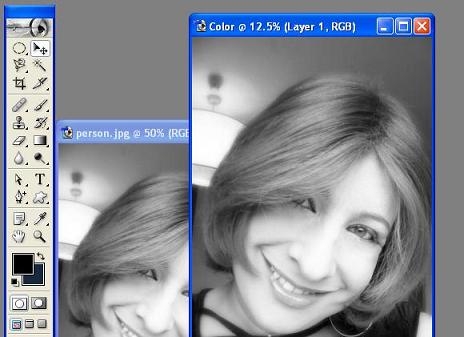 It is possible that your image will appear small in size on your layer. You will need to resize it. Click on Edit and then click on Free Transform. Then make the image larger by dragging a corner. Create another layer. 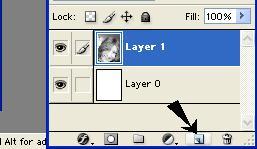 Now right click on the Pen tool you will get the options that are below. Select Pen tool from them. 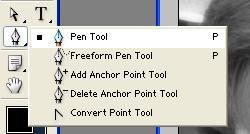 Before we start coloring the image remember layers are very important, specially the sequence of the layers. We had selected a new layer click on it. First we will color the face of the women. Select your pen tool and choose your foreground color as close to the skin color. I used FAD2A7. Start clicking on the face area where you want this color to be, something similar as the below image. 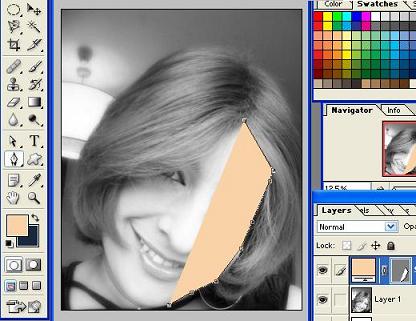 Remember you have to complete a circle. It should end from the point you started. In this case we started from the forehead so my last click should be on the same spot from where I started. Once you have covered the whole face you can use the Add Anchor Point to give it a perfect shape. Have a look at the below picture. 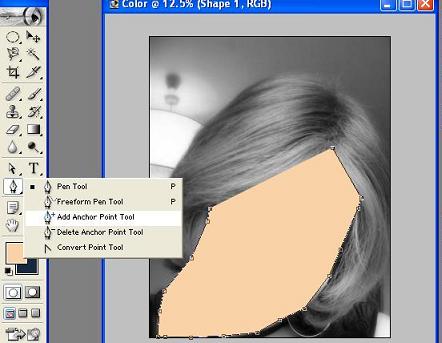 We use Anchor points so that we can cover each and every corner of the face. 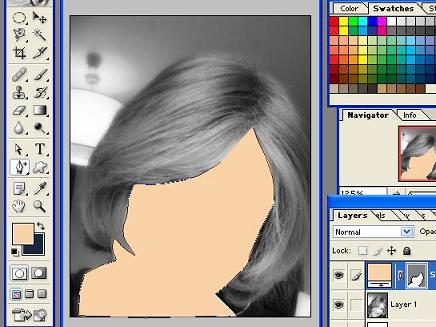 Once your face is covered follow the steps as below. 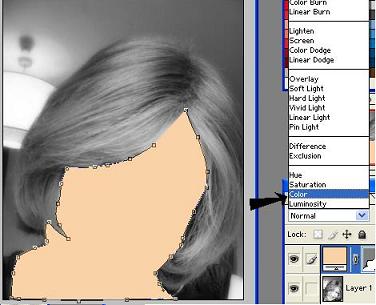 In the Layer Palette you will need to change the settings from Normal to Color. By default it will always be Normal. Your image will look something similar to the image below. 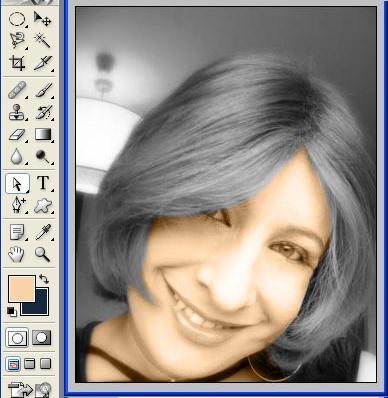 Now we will color the hair. Create a new Layer for the hair. Choose your hair color as per your requirement. Golden, Burgundy, etc. I have taken A17C24. 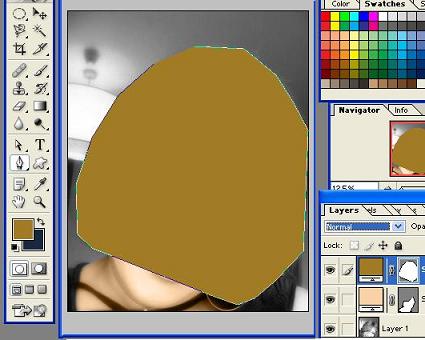 Your face will be colored with the new color that you're filling for the hair. Follow the same procedure as we did for the face use anchor points you will get a picture as below. 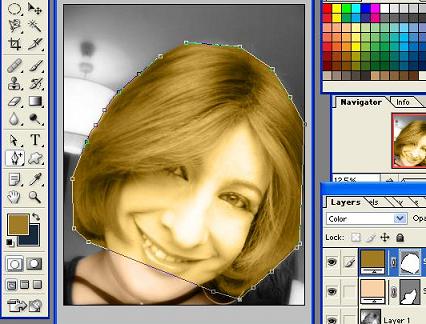 This is where your Layers sequence comes into play. You will see that your hair color is overlapping your face color so drag your hair layer below the Face layer. Click on the Hair layer and just drag it below the Face Layer. Like the below Image. 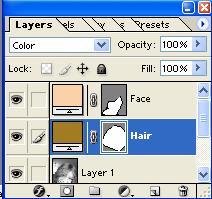 The Face layer is now on the top you can see the difference on your Image. The hair color is no longer overlapping your face color. Your image will look similar to this. 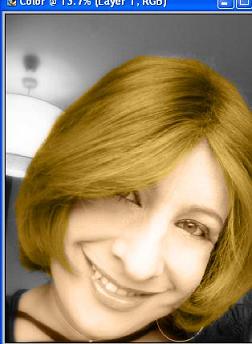 Now let's color the eyes. We will follow the same steps. 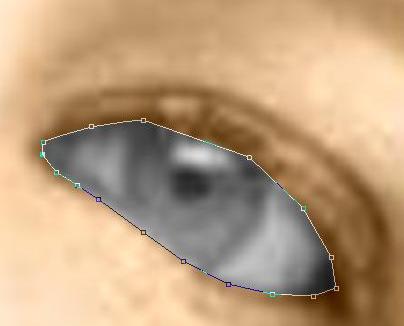 Now will select the Marquee tool and draw the pupil. Select green/brown or whatever color that you think will contrast with the face and hair color. 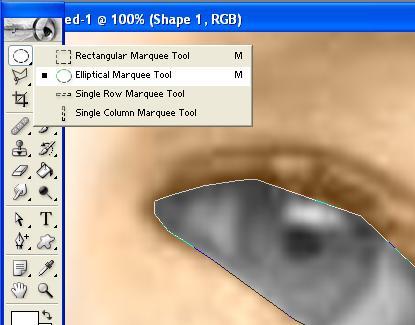 Now when you're using the marquee tool you will need to fill in color with the paint bucket tool. Don't forget to do this on a new layer. Do the same for the other eye. Follow the same steps to give color to the lips, the same way as we did for hair/eyes. Create a new layer and remember once your done move the layer to the top position otherwise the color of the lips won't be seen. At the end, you need to rasterize all the layers. Right click on a layer and click on Rasterize Layer. At the end you image will look something similar to the below image. 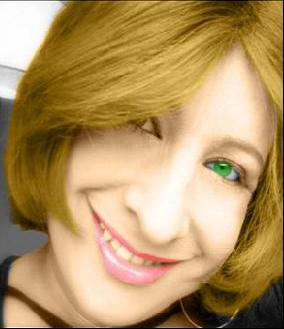 Hope you liked this tutorial. This tutorial is written by aabeeroy. Tutorial toolbar: Tell A Friend | Add to favorites | Feedback |

