

Products
Database Search Solution (New Version) Search Control SEO Pager Highlighter Shortcut Controls Crypt Package Free ASP.NET Controls
Geotargeting Component ASP.NET Media Player Control Flash Video Player Control Services
ASP.NET Telecommute Jobs Free IP Location Lookup Test .Net Regular Expressions CSS/Table/DIV Page Layouts Custom Programming Article Sites Master List |
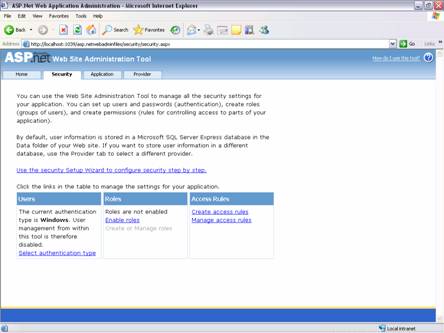
User registration and authentication for an ASP.NET 2.0 websWeb portals have been around for sometime now. They act as repositories of information and provide customized content for different categories of users. If the portals provide free access to all users, the design would not be too complicated. A database at the back end would not be a requirement. If access rights have to be limited across categories of users the design tends to be more complicated. Authentication and authorization protocols will have to be established by setting up a database at the backend. ASP.NET 2.0 makes the task of website design very easy by providing a number of tools for authentication, authorization, pre-user customization, common layout and dynamic menus based on a XML sitemap file. Very little programming skills are required for harnessing these tools to the task at hand. As an added bonus, ASP.NET 2.0 has a built in AspNetAccessProvider that stores details about users of the application which works well with both forms based authentication and Windows based authentication. However, if you feel that you need to hardcode your access rights and roles ASP.NET 2.0 provides a number of new classes that can be used with ease by the inveterate programmer. Understanding Authentication processAuthentication is a process of determining the identity of the user while authorization is the process of determining whether the user is eligible to access all pages or some pages only. Authentication begins when the user requests for a page from the protected application. The server checks if the user is already authenticated by searching for an authentication cookie that contains the authentication ticket in the request. If found it proceeds to check the membership rights else it directs the user to the login page demanding that he enter a user name and password and also sends the authentication ticket of the requested page as a cookie to the browser . When the user logs in with the required information, it posts the page back to the server for authentication. If the user name and password is found to be valid the server examines the cookie for details of the requested page and sends the same to the browser for viewing by the user. Else the user is directed back to the login page. Normally the authentication is only for a session. However, use of persistent cookies will enable the developer automatically log in the user for future sessions. Setting up Authentication and authorizationWhen setting up the ASP.NET 2.0 application you begin by starting the Web Site Administration tool. Select ASP.NET Configuration command from Visual Studio Menus by clicking Website>ASP.NET configuration. The web browser displays the home page for this tool. Click on Security tab to access a page like the one below. Click the link that starts the Security Setup Wizard. This wizard will walk you through the several steps of setting up the security for your application. Alternate options of using the links at the bottom of the page to set up authentication type, user roles and access rules are also available. 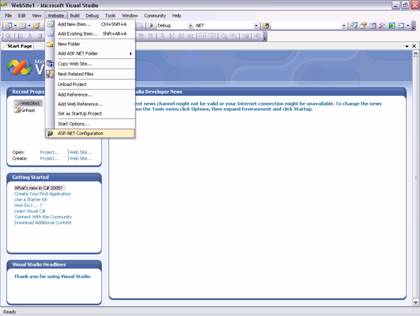
 Windows authentication is the default mode. However, if you have to set up the forms based authentication you will need to click on Select Authentication type link under the Users column. Thereafter you will be prompted to select the type of access—whether your users will be accessing your site through the Internet or the Intranet. Select the radio button specifying “From the Internet†and click Done. 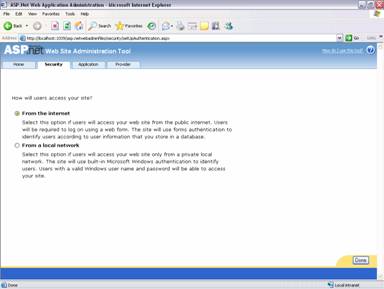 This brings you back to the security page of the web browser. You can now create users and roles for these users. Creating Roles and managing them.Roles are disabled by default and are optional. To create user roles, developers must enable roles while creating users and access rules. All this can be done in one place and you will be spared the necessity of having to go back again and again to define roles and access rights of users. 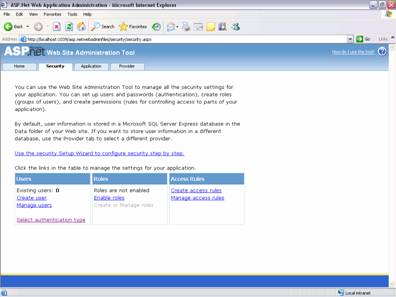 Click on Enable roles button under the roles column of the page and navigate to the screen that enables you to add roles. Once the role is created, a link will appear at the bottom of the roles column and you can create or manage roles by adding access rules to the role. As a result, a change in the access rights of a role will change the access rights of all users under a role. 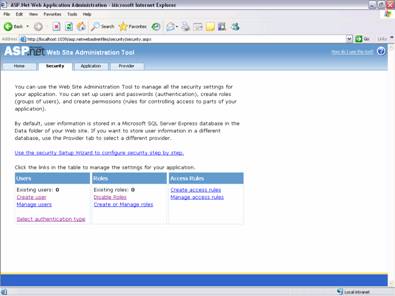 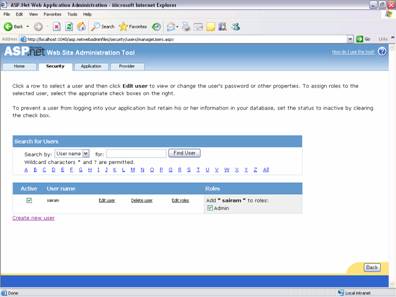 If you have already created a number of users, you can now click on the manage link to add users to the role by selecting the users from the list of users. If you have not created users, you can now create users by clicking on the create user link and filling in the details of username, password and security question. 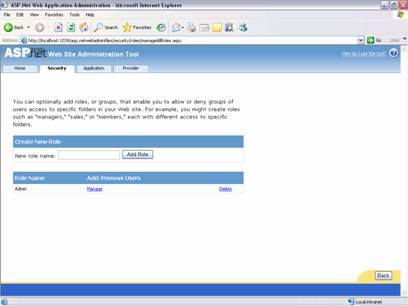 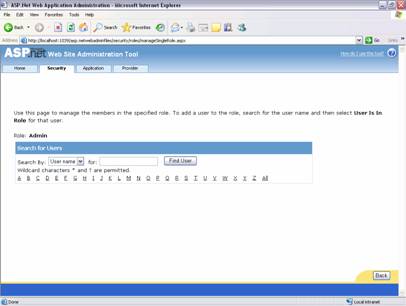 ASP.NET 2.0 has a default password policy which requires that the password should be at least seven characters long and one of the characters must be non-alphanumeric. This policy can be relaxed by the developer by adding certain attributes to the membership provider. We will examine this a little later in this tutorial. 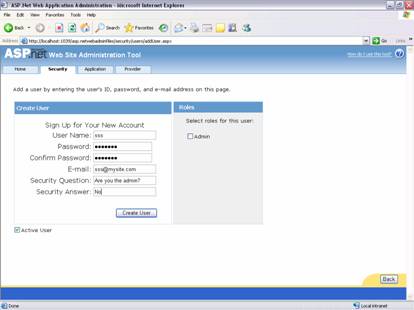 Once one or more users are created, you can assign them the roles or assign new roles by using the Edit Roles link. The user status can be turned inactive if you want to prevent the user from logging in to the application. The user information in such instances will be retained in the database, but the user will not be able to access the web pages of your application. Searching for users and assigning rolesThe Search user feature can be used if there are a large number of users in your application. The search can be by selecting the email address of the user from the drop down combo box or by entering the email address in the text box. * and wild card characters can also be used to search for users in the application or you can click on the alphabets to display all emails beginning with a specific alphabet and then browse through the list to select the user you want. 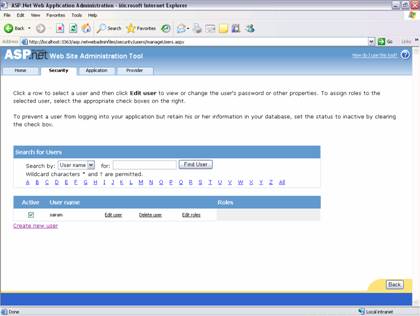 Applying Access RulesAccess rules restrict the user from accessing all parts of the application. To apply access rules to the entire application you can select the root directory of the application and apply the rule. This will make this rule applicable to subfolders of the application also. If you want to restrict rights to a specific subfolder, you need to apply the rule to the subfolder only. However, it is common to allow users access pages which are placed in the root directory and to restrict rights to pages placed in other directories of the application. To create access rules for each role click on the create access rules link under the Access Rules column of the web browser page under the security tab. You can optionally add access rules to control access to the whole Web site or to individual folders. Rules can apply to specific users and roles, to all users, to anonymous users, or to some combination of these. Rules apply to subfolders. The following page will be displayed. Set the access rules after selecting the role and the user. 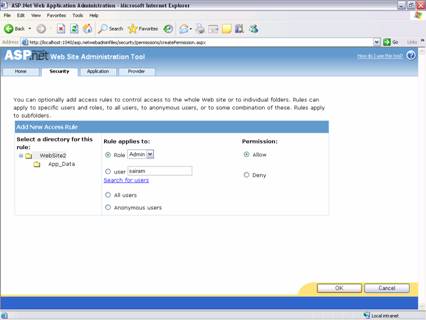 Once the access rules have been created the same can be managed by clicking on the manage access roles link in the web browser page of the tool under the security tab. 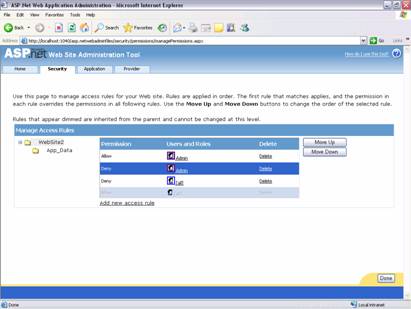 Modifying the membership and role provider:The data provider class contains the code that reads and writes data for users and roles. When it is linked with membership, then this class is known as membership provider while the one linked with roles is called the role provider. Both these providers are stored in AspNetSqlProvider. The database is known as AspNetDB.mdf and is stored in the App_Data folder of the website. This database is automatically created and works well for prototyping. The attributes of the data provider can be changed or modified to redefine the way the provider behaves. The strict password requirements can be relaxed for instance by copying the membership element from the machine.config file to the web.config file of your application and editing the Name attribute of the <add> element to create a unique name for the modified provider. The minRequiredPasswordLength and minRequiredNonAlphanumericCharacters attributes can then be redefined. Finally you can add the defaultProvider attribute to the <membership> element so that the application begins to use this provider. An edited sample of the code is placed below for your reference:
The architecture of ASP.NET 2.0 allows you to use different providers or custom provider if you so desire. User Registration, login and related controls.Once the user roles and access rights have been defined, users must be allowed to register themselves and then login and browse the pages of your web application. The first step that is usually taken is the creation of the Login.aspx page. ASP.NET 2.0 creates all the login functionality the moment you drag and drop a login control onto your page in design view. The login control has two text boxes—one for user id and another for password. It has a button for submitting the login information. The login status and the LoginName controls have to be dragged and dropped on to the application pages to provide the additional functionality of checking whether the user is logged in or not and his name. A number of views of the Login control are inbuilt into ASP.NET 2.0. It can be automatically formatted by right clicking the control and selecting the AutoFormat command. Then the format of your choice can be selected from the dialog box that opens. The formatting properties of the control will change according to the selection made. The Login control can be set to force the user to use a secure connection. 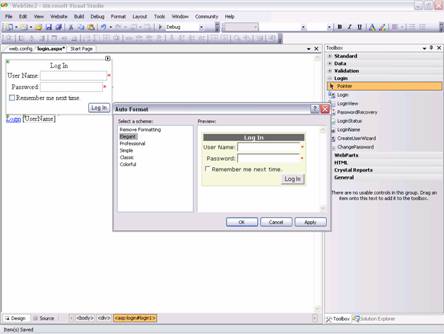 Links can be created for users who have forgotten their password or want to register as a new user. The hyperlinks can be designed to open the relevant pages. The CreateNewUser Wizard Control and PasswordRecovery control can be placed on NewUser.aspx and PwdRec.aspx pages of your application to get the necessary inputs from the user. The membership provider is used to write the data to the appropriate data source. 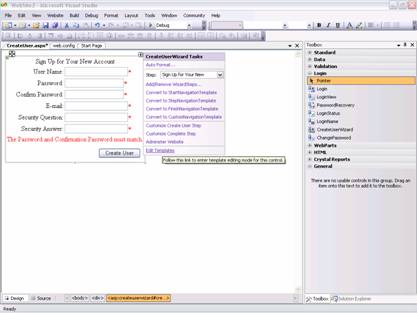  The ChangePassword control is used to allow the user to change his password. The code files are automatically created providing all the necessary functionalities for this purpose. 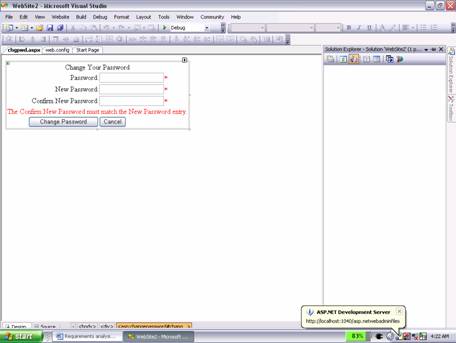 The Autoformatting feature available for the Login control is also available for the CreateUser control, the PasswordRecovery control and the ChangePassword control. The Directory Structure of the Authentication Application explainedThe App_data folder stores the SQL Server Express database. It database contains all the tables that contain the information about the web sites registered users and their roles. Additionally it contains directories that store web pages that have restricted access. Separate web.config files can be created for the root directory and other directories if the developer wishes to do so. The Web.config filesWhen the Web site Administration tool is used to create access rules the web.config files are automatically modified. However, it is a good idea to open these files and have a look at what is going on under hood. Since these files are in XML, it would be a good idea to understand the code in them. Later when you have gained more confidence in your handling of ASP.NET 2.0 you may like to manually edit these files to provide you with more sophisticated functionality. Using Code to work with AuthenticationASP.NET 2.0 provides a number of new classes for code to work with authentication. These classes are stored in the System.Web.Security namespace. The Membership Class uses the Membership Provider specified to read and write data from the data store. The methods of this class are static. These methods can be used to create or delete users or catch exceptions when they occur. These methods can also help retrieve, update data that is stored in the MembershipUser Class. Custom login controls will use the ValidateUser method of this class to authenticate the user. A detailed list of the methods of the MembershipUser Class is available in the System.Web.Security namespace. Other classes that are popularly used in ASP.NET 2.0 with authentication are FormsAuthentication class and Roles class. Both these classes provide a number of static methods. (Since a detailed study of these methods is beyond the scope of this tutorial, a mere mention of the class is being made here). In this tutorial we have focused on providing you with the basic skills you need for setting up a user authentication system in ASP.NET and launching your application. The personalization feature that has been built into ASP.NET 2.0 will help you store user profiles and preferences and any custom information about your users. The authentication process along with the personalization process provides the user with a powerful and personalized user experience. Tutorial toolbar: Tell A Friend | Add to favorites | Feedback | |