Products
Database Search Solution (New Version) Search Control SEO Pager Highlighter Shortcut Controls Crypt Package Free ASP.NET Controls
Geotargeting Component ASP.NET Media Player Control Flash Video Player Control Services
ASP.NET Telecommute Jobs Free IP Location Lookup Test .Net Regular Expressions CSS/Table/DIV Page Layouts Custom Programming Article Sites Master List |
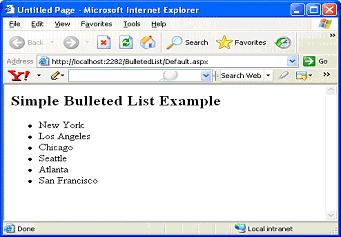
Bulleted List Server Control in ASP.NET 2.0As part of our discussion on new ASP.NET 2.0 features, we now discuss new server control Bulleted List. In our efforts to display organized data which makes sense to reader, we make use of different server controls in ASP.NET 2.0 to render organized data. Similarly, Bulleted List control also helps in displaying collection of items in a bulleted list. The Bulleted List server control is meant to display a bulleted list of items easily in an ordered or unordered fashion. To specify the individual list items in the list, you put a ListItem control for each list entry between the opening and closing tags of the Bulleted List control as shown in code listing below. You can download sample web project, used in this tutorial. You can also determine the style used for displaying the Bulleted list. The Bulleted List control can be constructed of any number of <asp:ListItem> controls or can be data-bound to a data source of some kind and populated based upon the contents retrieved. Below listing shows simple Bulleted list
<%@
Page Language="C#"
AutoEventWireup="true"
CodeFile="Default.aspx.cs"
Inherits="_Default"
%> The use of the <asp:BulletedList> element, along with <asp:ListItem> elements, produces a simple bulleted list output as shown below
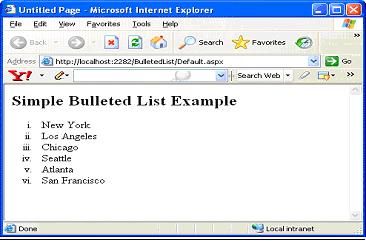
Bulleted List Server Control AttributesWhen you define items for the Bulleted List control, you define two properties: the Text property and the Value property. The Text property defines what the control displays on the page. The Value property defines a second value that is not displayed but that you might want to know when a user selects an item Customizing Bullet List AppearanceBulletStyle: The Bulleted List control also enables you to easily change the style of the list with just one or two attributes. The BulletStyle attribute changes the style of the bullet that precedes each line of the list. Possible values are:
In below output, you can observe the new style which I have used to list the items by setting BulletStyle attribute. <asp:BulletedList ID="BulletedList1" BulletStyle="LowerRoman" runat="server">
FirstBulletNumberYou can also change the starting value of first time in any of the numbered styles by using the FirstBulletNumber attribute. If you set the attribute's value to 7 when you see the LowerRoman setting, for example, you get the format illustrated given below <asp:BulletedList ID="BulletedList1" FirstBulletNumber="7" BulletStyle="LowerRoman" runat="server">
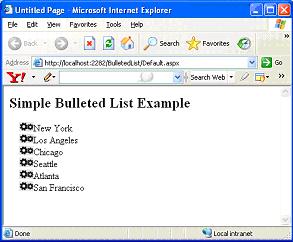
CustomImageTo employ images as bullets, use the CustomImage setting in the Bulleted List control. You must also use the BulletImageUrl attribute in the following manner: <asp:BulletedList ID="BulletedList1" BulletStyle="CustomImage" BulletImageUrl="~/script.jpg" runat="server">
DisplayModeBulleted List control has an attribute called DisplayMode, which has three possible values:
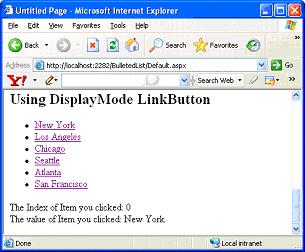
DisplayMode Text allows displaying items in Bulleted List as static text. DisplayMode LinkButton turns each bulleted list item into a hyperlink that posts back to the same page. It enables you to retrieve the selection that the end user makes as illustrated in below listing
<asp:BulletedList
ID="BulletedList4"
DisplayMode="LinkButton"
runat="server"
OnClick="BulletedList4_Click1">
In above example, the DisplayMode attribute is set to LinkButton and the OnClick attribute is used to point to the BulletedList4_Click event. BulletedList4_Click uses the BulletedListEventArgs object, which only exposes the Index property. Using that, you can determine the index number of the item selected. Similarly, you can directly access the Text value of a selected item by using the Items property. Dynamic Bulleted ListsNow that you have seen how to create bulleted lists with items that you declaratively place in the code, take a look at how to create dynamic bulleted lists from items that are stored in a data store. The following example shows how to use the Bulleted List control to data-bind to results coming from a data store; in it, all information is retrieved from an XML file. The first step is to create Companies.xml as shown below.
<?xml
version="1.0"
encoding="utf-8"
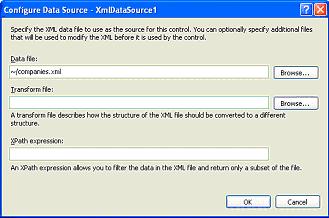
?> To populate the Bulleted List server control with the Name attribute from the Companies.xml file, use an XmlDataSource control to access the file, as shown below. Configure XmlDatasource for the Bulleted list by chosing Show Smart Tag option from context menu. From Show Smart Tag window, click Configure Data Source option. You can see following window. Click Browse button to add Data file as shown below.
Now that you have configured XmlDataSource control with necessary Xml file, link this XmlDataSource control with Bulleted list control to display dynamic data. Right click the Bulleted list control in Design mode and choose Smart Tag option. From Smart Tag Tasks, Choose Configure Data Source option. You will see below given window after you click Configure Data Source
You might observe that I have chosen <Name> attribute in Companies.xml to be displayed as Data Field in Bulleted List control. Similarly, to display value for data field, I have again chosen <Name> attribute value from xml file. That makes sense rite!. It's done
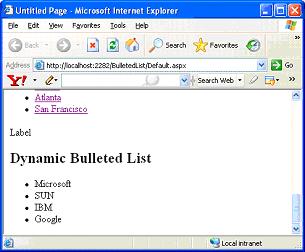
Above output says it all, Bulleted List control pulled all Name attribute values from the xml file. Tutorial toolbar: Tell A Friend | Add to favorites | Feedback | |