Products
Database Search Solution (New Version) Search Control SEO Pager Highlighter Shortcut Controls Crypt Package Free ASP.NET Controls
Geotargeting Component ASP.NET Media Player Control Flash Video Player Control Services
ASP.NET Telecommute Jobs Free IP Location Lookup Test .Net Regular Expressions CSS/Table/DIV Page Layouts Custom Programming Article Sites Master List |
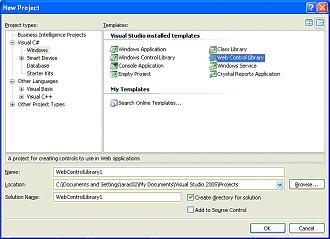
ControlState Property DemystifiedASP.NET web applications are based on stateless HTTP protocol. New instance of the web page class is created each time the page is requested from the server. So, this would mean that all data on the page will be lost when page is posted to server. Then how do we create pages with controls which can preserve data across page postbacks. To overcome this inherent limitation of Web programming, the ASP.NET page framework offers several state-management features, one of which is ViewState, to preserve page and control values between round trips to the web server. You can access view state using page's ViewState property to preserve data during round trips to the web server. The ViewState property maintains ViewState information using key/value pairs But ViewState has one major drawback. ViewState property can be disabled. In ASP.NET 1.x, Custom controls had only option of using ViewState to store critical information across postbacks. But a developer using custom controls can disable ViewState which can ultimately break the control. To fix this, ASP.NET 2.0 has introduced a new kind of ViewState called ControlState which is essentially a private ViewState for your control only, and it is not affected when ViewState is turned off. You should only store data in the ControlState collection that is absolutely critical to the functioning of the control. Use ControlState to store small amounts of critical information. Heavy usage of ControlState can impact the performance of application because it involves serialization and deserialization for its functioning. This article describes the implementation of control state in an ASP.NET 2.0 web custom control. To see things getting started, download example ControlState Visual Studio .Net project, used in this tutorial.
Example will show how to create custom control name ApartmentListing that uses ControlState property to preserves state across page requests. As told earlier, ControlState cannot be disabled so that critical information is available on postbacks for the control to function properly. Implementation of ApartmentListing custom control illustrates three important tasks that you must perform to enable a control to participate in a control state:
The ApartmentListing control renders HTML table element which holds properties by overriding the inherited RenderContents method. The parameter passed into the RenderContents method is an object of type HtmlTextWriter, which is a utility class that has methods for rendering tags and other HTML (and HTML-variant) markup. This improves performance because the HtmlTextWriter object writes directly to the output stream At the class level, ApartmentListing is marked with the following attributes:
<cc1:ApartmentListing ID="ApartmentListing1" runat="server" Apartment="1BHK" LeasePeriod="1 yr" Rent="$1000" Space="1000sq" State="IL" /> The following attributes are applied to public properties of ApartmentListing which are standard design-time attributes that you will generally apply to all public properties of your controls:
We are using structure variable to retrieve and set the properties values for ApartmentListing custom control using the defined properties for each structure element. To test the ApartmentListing custom control, rebuild the project. Now add new website to existing solution that hosts ApartmentListing web control library project. After adding new website, you can find ApartmentListing custom control in Toolbox. Drag and drop the ApartmentListing control onto the page as shown below 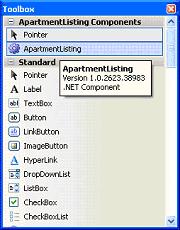
<%@
Register Assembly="WebControlLibrary1"
Namespace="WebControlLibrary1"
TagPrefix="cc1"
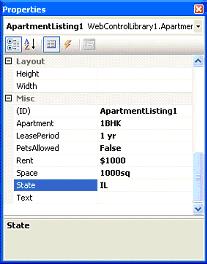
%> 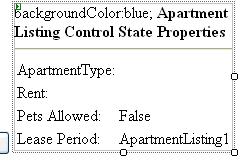 Now, you can deal with ApartmentListing custom control in the same manner as you do with a standard ASP.NET control. For example, to set the values for properties for ApartmentListing control, right click the control in design mode and set the properties as shown below:
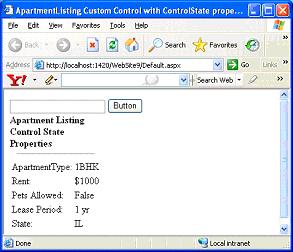
Now, Build the solution by pressing F5 button. You can see the output as shown below which displays the values for defined properties for ApartmentListing control.
It's time to see the magic of ControlState property. I change the value for ApartmentType property value by entering a new value in textbox and click submit button as shown below. You can see that when we click submit button, it generates a postback. After page postback, you can see that ApartmentListing control has persisted properties values across page postback. It also shows the updated value for ApartmentType property. Now you can go ahead and create your custom controls which can persist some critical data across page requests. Tutorial toolbar: Tell A Friend | Add to favorites | Feedback | Google |