

Products
Database Search Solution (New Version) Search Control SEO Pager Highlighter Shortcut Controls Crypt Package Free ASP.NET Controls
Geotargeting Component ASP.NET Media Player Control Flash Video Player Control Services
ASP.NET Telecommute Jobs Free IP Location Lookup Test .Net Regular Expressions CSS/Table/DIV Page Layouts Custom Programming Article Sites Master List |
Custom Rendered Controls In ASP.NETCustom Web Controls are reusable controls with user defined behaviors. Custom web controls are simply classes which contains own methods, attributes, events and behaviors and provides all aspects of OOPs. We can broadly classify custom web controls into two categories: - Rendered controls - Composite controls Custom Rendered ControlsCustom Rendered controls provide facility to give user defined look and feel to a control. They are very powerful and very flexible controls with user defined behavior. They are complex to create but their advantages are unlimited. Create a Custom ControlThere is no visual interface is provided to design a rendered custom control in ASP.NET. Every thing must be defined by the developer creating a custom control. Visual studio just creates a class which inherits from WebControl Class. The developer has to override the RenderContents method of the WebControl class. The RenderContents method provides the look and feel of the Rendered Control. Following are the steps to create a rendered control. 1. First create a new Web Site in Visual Studio 2005 name it CustomWeb. It will work as base project where we will use our custom control. 2. Now it is time to create a custom control. 3. Click on File Menu -> Add->New Project 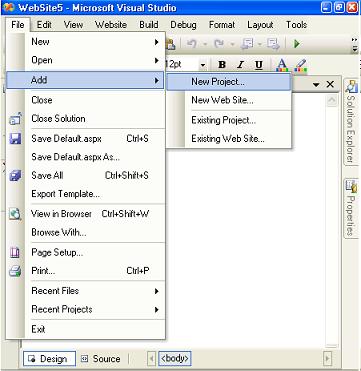 4. Name the new project MyNumericBox. Choose the project type as Windows project, and select Web Control Library as the template. 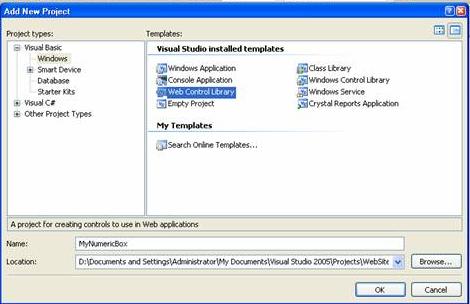 5. Visual Studio creates a simple Web control and generates following code. Imports
System The code contains a class derived from System.Web.UI.WebControl, Whereas WebControl derives from the standard Control class. The code has a single property named Text and overrides Control's RenderContents method. The RenderContent method sends the value of text property to the web browser using write method of HtmlTextWriter class. 6. Compile the project by selecting Build -> Build Solution from the main menu. 7. Now switch to the Default.aspx of your web project. Click on Design tab at right bottom corner of window. Open the toolbox by pointing the cursor over the toolbox tab on the left-hand side of Visual Studio. You will see WebCustomControl1 at the top of the toolbox. 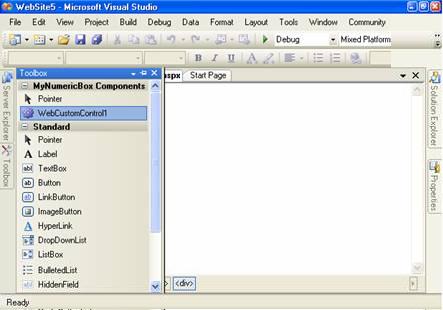 8. Pick up the WebCustomControl1 from the toolbox and drop it onto the Web form. The text showing within the control is blank, which is the default text of a rendered control. Change the Text property of the control to 0 and it will appear in the designer. 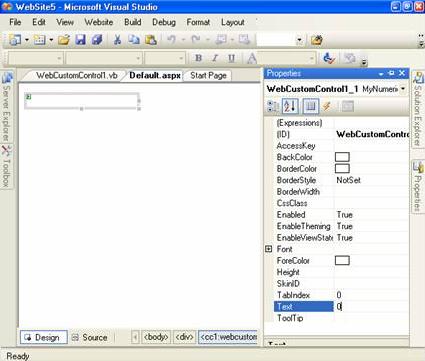 Now switch to source view of Default.aspx by clicking source tab at bottom of window. You will see following code generated by Visual Studio 2005. <%@
Register Assembly="MyNumericBox"
Namespace="MyNumericBox"
TagPrefix="cc1"
%> The Register directive maps the assembly and the namespace with a tag prefix. Here the assembly name is MyNumericBox and Namespace is also MyNumericBox and the prefix is cc1. Any control with cc1 prefix will be looked for in the MyNumericBox Assembly. Here cc1:WebCustomControl1 means WebCustomControl1 class in assembly mapped by cc1 prefix. Text="0" means the default value of text property is zero. 9. Now switch to design view again for the Default.aspx and add a text box and a button to the Web page. 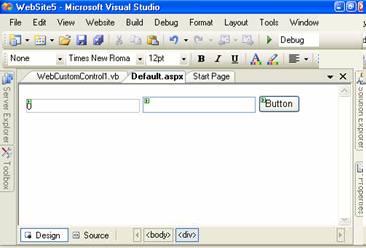 10. After you drop them on the page, Visual Studio adds the code shown below. <form
id="form1"
runat="server"> 11. Add an event handler for the push button by double-clicking on the button in the designer. Have the push button pull the text from the TextBox and use it to set the control's Text property. Protected
Sub Button1_Click(ByVal
sender As Object,
ByVal e As
System.EventArgs) Handles Button1.Click 12. Now run the website using start button, Default.aspx will open on web browser. When you type something into the text box and click the button, the browser sends your request to the server. The browser responds by taking the text from the TextBox and using it to set the Text property of the WebCustomControl1. 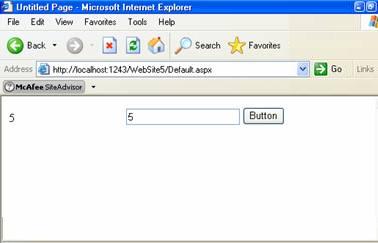 13. Change the rendering method to print Negative numbers in red and positive in black. The RenderContents method takes a single parameter of type HtmlTextWriter. This class is used to output properly formed HTML at the insertion point of the custom control into a web page. The HtmlTextWriter allows the developer to code attributes, style attributes, and tags as well as providing the means to render within a custom web control. Protected
Overrides Sub
RenderContents(ByVal output
As HtmlTextWriter) Run the page and test the control by entering a number. Positive will appear in black color and negative will appear in red color. 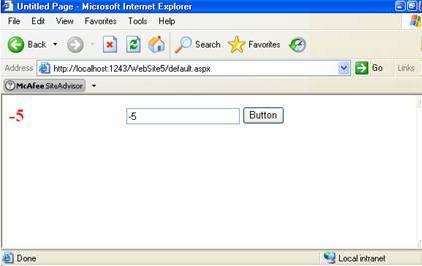 Adding an events to rendered controlsWe can add event to the custom control so that it can notify the host web page that some thing is happened. Now we will add a NegativeFound event to our custom control so that the Default.aspx is notified that Negative number is found. 1. Open the source code of custom control. Add Following code. Public
Class WebCustomControl1 2. Now, fire the event when detecting a negative number in the Text property's set method. <Bindable(True),
Category("Appearance"), DefaultValue(""),
Localizable(True)>
Property Text() As
String Rebuild the project. 3. Now we have to link the event in the Default.aspx page. Remove the current instance of the custom control from the page and drop a new instance on the page. This will refresh the property window of Visual Studio to show the newly added event. 4. Select the custom control on the page and click the Events button (the little lightning bolt) in the property page in Visual Studio. Double-click on the text box next to the NegativeFound event. Visual Studio will create an event handler method in the source code of Default.aspx that is Default.aspx.vb file. 5. Write code to handle the event. Partial
Class _Default You will see the following when you type a negative number and press Button. We used JavaScript to show a message box to the client machine when negative number is found. The reason to use JavaScript is that only client side language can show a message box on client machine. We cannot use ASP.NET to show message box because ASP.NET is server side programming technique. 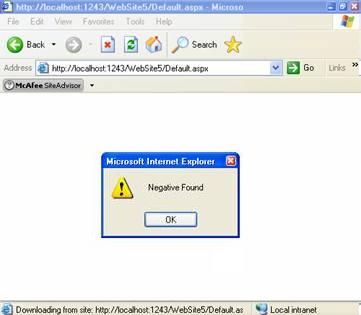 Tutorial toolbar: Tell A Friend | Add to favorites | Feedback | Google |