Products
Database Search Solution (New Version) Search Control SEO Pager Highlighter Shortcut Controls Crypt Package Free ASP.NET Controls
Geotargeting Component ASP.NET Media Player Control Flash Video Player Control Services
ASP.NET Telecommute Jobs Free IP Location Lookup Test .Net Regular Expressions CSS/Table/DIV Page Layouts Custom Programming Article Sites Master List |
Data Source Controls in ASP.NET 2.0Most of commercial web applications you see around are data driven. These web applications rely on data sources (databases) for storage and retrieval of data. In ASP.NET, you can perform data access either programmatically or declaratively with out writing single piece of code. You can perform all common database related tasks like displaying, editing and updating the data with minimum effort. ASP.NET 2.0 has got some smart and intelligent new data source controls which can even manipulate specialized data sources like XML files. Data Source ControlsData Source controls are new server controls that performs the core task of connecting to a data source, handles all database related tasks like reading, writing and updating the data. It acts as coordinator between underlying different physical data sources at data access layer and data bound controls like GridView, DataGrid at presentation layer. These new Data Source controls are built with features like sorting, paging, editing and updating data directly in data source. You can seamlessly integrate these features into your application with out writing any custom code. Voila, it's beautiful. Don't you think so! We will discuss capabilities and worthiness of new Data Source controls available in ASP.NET 2.0. I am limiting my discussion to only significant controls which happen to be the following given ones.
You can find all this new controls under data section of Toolbox as shown below. 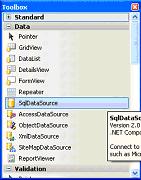 ObjectDataSource controlThis new DataSource control represents a middle-tier business object in a multi-tier application. It acts as a data interface for data bound controls such as GridView controls. It enables data bound controls to perform database tasks like retrieval, editing and updating using intermediate middle-tier business object. It provides a structured way for you to bind data bound controls on page to middle-tier business object. You can declaratively bind data bound controls to business objects without writing single piece of code using ObjectDataSource control. How it works?ObjectDataSource control uses Reflection to expose and call the appropriate methods of a business object to select, insert and update data. You can use Typename property of ObjectDataSource control identifies the class with which ObjectDataSource control works. Basically, you wire methods at business layer with operations at presentation layer. This way you can have absolute strict control over the flow of the program. Different Operations supported by ObjectDataSource control
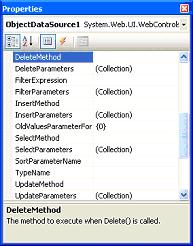
Below figure should give an idea of above properties. You can specify parameters for any of these methods using corresponding parameters collections.
To retrieve data from a business object, set the SelectMethod property with the name of the method that retrieves data. After setting SelectMethod property, call the Select method which provides programmatic access to business object's method which is set as SelectMethod property. For best results, set the DataSourceID property of data bound controls which bounds data automatically to the control. ObjectDataSource control supports sorting and paging capabilities by passing sort and page information requests from a data bound control. ObjectDataSource control can also cache objects returned by business objects. The major drawback of ObjectDataSource control creates and destroys an instance of the class for each method it calls. It doesn't hold object in memory for lifetime of the request. This can hit performance. You can control the life cycle of each object using the ObjectCreating, ObjectCreated and ObjectDisposing events. You can only work with given capabilities of business object. If the attached business object supports updating and editing of data then you can perform this operations using ObjectDataSource control. To perform these data operations, set the appropriate method name and any associated parameters for the operation that you want to perform. For example, for an update operation set the UpdateMethod property to the name of the business object method that performs updates and adds any required parameters to the UpdateParameters collection. Let's jump into an example to consolidate our understanding of the capabilities of ObjectDataSource control with a GridView control that displays data on a web page using ObjectDataSource control. As discussed earlier, ObjectDataSource control identifies appropriate class name of business object using its TypeName property and a business object method that is called to retrieve data with its SelectMethod property. Launch Visual Studio 2005 and add a class named product to project and add following shown method.
Public
Function getProducts()
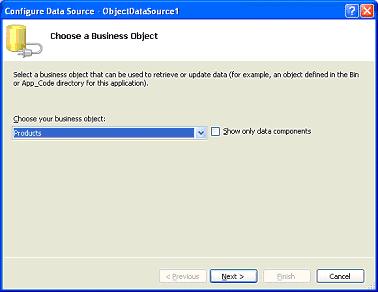
As DataSet The Products class contains a getProducts method that returns a dataset containing all the products in the Northwind database. Using the ObjectDataSource control, you can allow a data control to bind to this class. To do so, drag-and-drop an ObjectDataSource control onto the default page. Click on the Configure Data Source link in the Smart Tag. You will see the window as shown below. Select the name of the business object-in this case it is the Products class-and click Next.
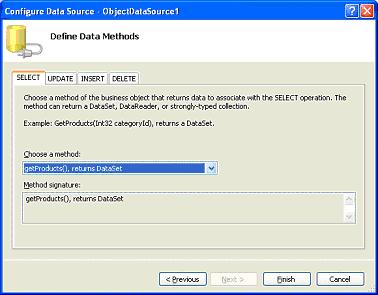
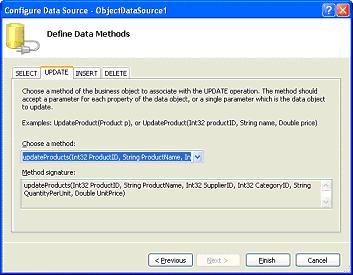
In the next window as shown below, you will select the method to use for each operation, such as Select, Update, Insert, and Delete. For this example, the Products class has only the getProducts method, so choose the getProducts method for the Select tab as shown below and click Finish.
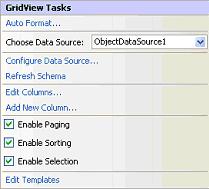
Next, drag-and-drop a GridView control to the page and bind it to ObjectDataSource1. Check the three options available in the Smart Tag-Enable Paging, Enable Scripting, and Enable Selection as shown below.
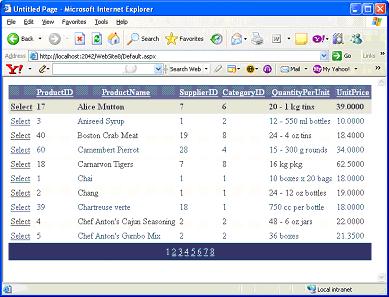
That's it! Press F5 to load the page. You will be able to see the records in the Products table in the Northwind database in the GridView control as shown below.
Let's consider editing rows in the table through the ObjectDataSource control. To do that, you need to have another method in the Products class to perform the editing work. So, add a new method called updateProducts to the Products class:
Public Sub
updateProducts(ByVal ProductID
As Integer, _ End Sub Now configure the ObjectDataSource control again. This time round, click on the Update tab, and select the updateProducts method. Then click Finish as shown below.
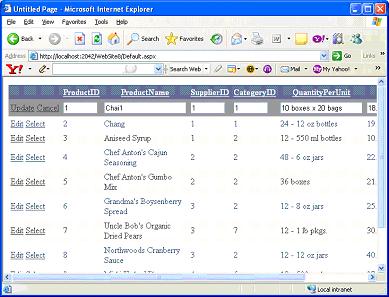
In the Smart Tag of the GridView control, check the Enable Editing option. Then, press F5 to load the page again. You can now edit the rows in the table.
Press CRTL+F5 and run the program and click Edit link against any row and enter new value and say update as shown below.
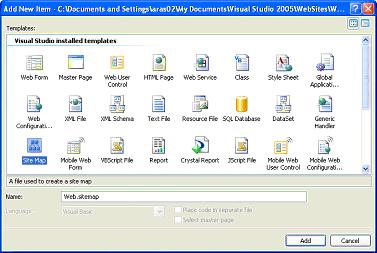
SiteMapDataSource controlThe SiteMapDataSource control is used for developing consistent navigation system for web application. The SiteMapDataSource control lets you define the structure of your site and allows navigational control to display structure. You can define one site map file for a website. By default, the SiteMapDataSource control will use the default Site Navigation Provider. The default site navigation provider is XML-based. It should stay in the root level of your project and should be named web.sitemap. Using the Site navigation API provided in ASP.NET v2.0 you can write your own Site Navigation Provider and expose the navigation information from any back-end system if needed. The SiteMapDataSource is specialized for navigation data and does not support common database operations like sorting, filtering, paging and caching. Setting the SiteMapDataSource controlBefore you add the SiteMapDataSource control to your page, you need to add the Site Navigation Provider. Setting the default Site Navigation ProviderRight Click the solution explorer and click Add New Item. In the templates dialog choose Site Map as shown below
When the web.sitemap file is created Visual Studion automatically creates the default initial code.
<?xml
version="1.0"
encoding="utf-8"
?> </siteMap> Each siteMapNode has three attributes:
Below is an example of a site map file, which you can paste in your test project:
<?xml
version="1.0"
encoding="utf-8"
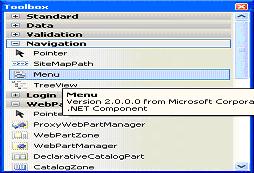
?> Setting the SiteMapDataSource controlAfter you have successfully set the Site Navigation Provider, you can set the SiteMapDataSource control to use it. Point to a navigation control on your site (e.g. TreeView, menu, etc.) and expand the Smart Tag panel of that control. We will use menu control to display sitemap data. Drag and drop the menu control from the Navigation section of Toolbox as shown below.
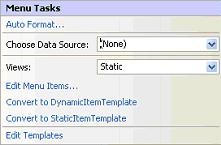
Configure the data source for the menu control by selecting show Smart Tag option and you can below dialog box as shown below
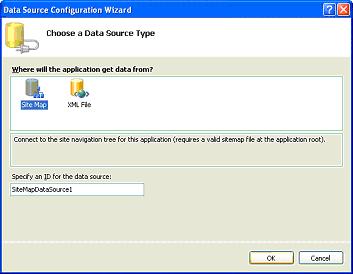
Open the Choose Data Source dropdown and select the <New data source...> option. Then choose the SiteMapDataSource control as shown below
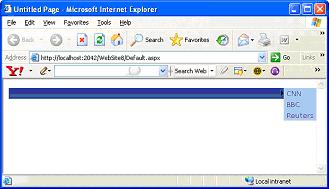
Press CRTL+F5 to run application and you can see the output as shown below.
XMLDataSource ControlXMLDataSource control will help display XML data. You can easily bound XML data to data bound controls which display hierarchical data using XMLDataSource control. Using DataFile property of XMLDataSource control, you can set the static XML file to be loaded to data bound control. You can also use Data property to display XML data. You can find detailed discussion regarding XMLDataSource control in a separate article titled XMLDataSource control. Check it out! All the new Data Source controls provide a lot of new features including built in declarative support for sorting, paging and updating features and support for XML data sources. Any seasonal or novice programmer can implement this new data source controls with less learning curve. Tutorial toolbar: Tell A Friend | Add to favorites | Feedback | |