

Products
Database Search Solution (New Version) Search Control SEO Pager Highlighter Shortcut Controls Crypt Package Free ASP.NET Controls
Geotargeting Component ASP.NET Media Player Control Flash Video Player Control Services
ASP.NET Telecommute Jobs Free IP Location Lookup Test .Net Regular Expressions CSS/Table/DIV Page Layouts Custom Programming Article Sites Master List |
Manual Threading in ASP.NET 2.0Recall That ..In Multithreading in ASP.NET tutorial we discussed multithreading, what is it, when to use it, what is the advantages and disadvantages of using it, and finally we presented the thread pool technique that you can use to develop a multithreaded application in an easy way. Some times this easy way is not sufficient to manage certain cases within your application, and the need for manually creating and fully managing a new thread arises. Creating threads manually is much more complex than using the thread pool, and requires you to have knowledge about threading life cycle and concepts. In this tutorial, we will explore the world of multithreading, we will understand how to manually create, manage, and synchronize threads. Some Basic Concepts about MultithreadingYou may already know that any operating system such as Windows or whatever, uses processes to separate the applications running on the machine in the same time. Each process by default starts with one thread. Operating systems can allocate run time per thread, not per process, or per application. Each thread has its time slice to execute in. Each process can have more than one thread. The .NET framework further subdivides each operating system process into managed sub processes called: Application Domains, represented by the "System.AppDomain" namespace. Each application domain can have one or more threads, and we will called them managed threads (represented by the "System.Threading.Thread" namespace). Each managed thread can run in one or any number of application domains within the managed process. Dealing with Managed ThreadsYou can deal with a managed thread through the "System.Threading.Thread" class, which gives you the ability to create, and control a thread, to set its priority, and to get its status. As you know, a process can create one or more thread to execute a portion of the program code associated with that process. During its life cycle, a thread is always in one state of the states defined by the Thread State enumeration. Examples of these states are: "Running", "Stopped", "Aborted", "Suspended", and so on. You can assign a priority level to your thread by using the "ThreadPriority" enumeration, like; "Normal", "AboveNormal", "Highest", and so on. You also can get your thread identification number by calling the "GetHashCode" method. Creating Managed Threads When an application is running for the first time, a new process is created, and the operating system injects a thread to execute code in this process. We call this thread the main application thread. You can get this thread or the current running thread by using the "Thread.CurrentThread" property. To explore this, let's create a new web application from "File / New / Web Site". In the "Default.aspx" design view, draw a label control. Double click the page area to activate the "Page_Load" event handler. Import the "System.Threading" name space as shown below (Our full application for this part of the tutorial can be downloaded here). 1 Imports System.Threading Then write the following lines of code. 5 Protected Sub Page_Load(ByVal sender As Object, _ 6 ByVal e As System.EventArgs) Handles Me.Load 7
8 GetCurrentThreadInfo(Thread.CurrentThread)
9
10 End Sub 11 Public Sub GetCurrentThreadInfo(ByVal MThread As Thread) 12 If MThread.IsThreadPoolThread Then 13 Me.Label1.Text = "Belongs to the Managed Thread Pool" 14 Else 15 Me.Label1.Text = "Does Not Belong to the Managed Thread Pool" 16 End If 17
18 Dim i As Integer = MThread.GetHashCode 19 Label1.Text = Label1.Text + " || ID = " + i.ToString 20
21 Label1.Text = Label1.Text + " || Priority = " _ 22 + MThread.Priority.ToString()
23
24 Label1.Text = Label1.Text + " || State = " _ 25 + MThread.ThreadState.ToString()
26 End Sub Run your application by pressing F5, and you will get a result similar to the following result. 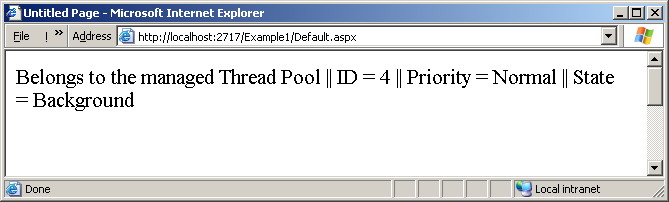 Figure 1 - Output showing the current thread information Now, type the following lines of code to create a new managed thread: 4 dim T as Thread
5 Protected Sub Page_Load(ByVal sender As Object, _ 6 ByVal e As System.EventArgs) Handles Me.Load 7
8 ' GetCurrentThreadInfo(Thread.CurrentThread) 9
10 '-- Create a new thread 11
12 T = New Thread(AddressOf LongTimeTask) 13 T.Start()
14 GetCurrentThreadInfo(T)
15
16 End Sub Now add the "LongTimeTask" method as follows: 33 Public Sub LongTimeTask() 34
35 'suspend the current thread for specified time. 36 Thread.Sleep(10000)
37 MsgBox("ok2") 38 End Sub From the above lines of code you can understand that to create a new thread all you need is to define a new thread instance and then giving it the reference of the method you want to run in a separate thread, then you will need to call the "Start" method of the thread. When you call this method, the new thread will be started, and the call will be returned immediately to the caller thread. The "GetCurrentThreadInfo" at line #14 will show information of our newly created and started thread. Run your application now, and you will get a result similar to the following: 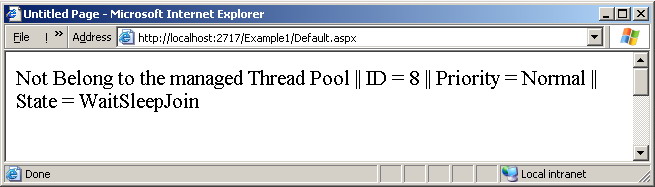 Figure 2 - Output showing the new thread information Pause and Resume In some situations you may want to pause a running thread for a certain period of time, to do this use "Thread.sleep(x)", where x is the period of pause time in milliseconds. You can also pause a thread by calling "Thread.suspend", and when you want to resume it again then just call "Thread.Resume" from within the working thread. You can also use "Thread.Join" to block the caller thread till the called thread finishes. Add the following lines of code in bold face to our "Page_Load" method to test this join method. 5 Protected Sub Page_Load(ByVal sender As Object, _ 6 ByVal e As System.EventArgs) Handles Me.Load 7
8 ' GetCurrentThreadInfo(Thread.CurrentThread) 9
10 '-- Create a new thread 11
12 T = New Thread(AddressOf LongTimeTask) 13 T.Start()
14 T.Join()
15 Label1.Text = "ok1" 16 ' GetCurrentThreadInfo(T) 17
18 End Sub Now Run the application and you will get after 10 seconds a message box that says "ok2", and after clicking it you will see "ok1" written in your label. This means that, the main worker thread that calls the "join" method stop execution till the new "T" thread finished executing its code, and then the main thread resumes its work again. Abort You can destroy (and obviously stop) a thread by calling "Thread.Abort" method. When you call this method a "ThreadAbortException" will be thrown. The thread can catch it and do whatever finalization in the associated "Finally" block of a "Try .. Catch ..Finally" block of code. Because that "Thread.Abort" does not terminate the thread immediately, you can call the "Thread.Join" to wait till the called thread is fully terminated. Once a thread is terminated or in other words aborted, you can not restarted it again. SynchronizationAssume that your application has two threads, and these two threads are performing calls to properties or methods of a single object, or may be to a certain piece of code into your application. Assume that the first thread changes one of this object's properties and while it is changing it, the other thread attempt to perform a change in the same property. The object in this case is not in a valid state, and this can crash your application! The problem is that you will not be certain of what is the value you will get, is it the old one, or the new one, or you will get an error? This is an invalid state that must be avoided, and this is what synchronization does. If an object is built to avoid such a problem then, we call this object 'thread safe'. Synchronization is about organizing or let us say serializing the access to shared resources. This is performed in such a way that only one thread at a time is allowed to access these resources. To be able to do this, .NET framework provides four categories of synchronization schemes, they are:
No Synchronization This is the default, any thread can access any field or method at any time. Synchronized Context This is a simple automatic way you can use to make any object of type "ContextBoundObject" thread safe by using the "SynchronizationAttribute" object. This means that any field or method of this "ContextBoundObject" object can be accessed by only one thread at any time, and this will be done automatically without writing any extra code from your side. Synchronized Code Region Under this category you can make use of some objects provided by the .NET framework to serialize access to a critical code region, or a shared object. By using the "Monitor" object you can serialize access to a shared object. It is just like a lock, that when one thread has, the other can not access this object until this lock is released. You can use "Monitor.Enter" to raise this lock, and "Monitor.Exit" to unlock. You can also use "SyncLock", or "Lock" to do the same but for lines of code not for objects. To mark some block of code as a thread safe block, use "SyncLock" / "End SyncLock" statement in visual basic, or "Lock / End Lock" in C#. By using these objects, all what you have to do is to mark your object or piece of code as a thread safe, and the common language runtime will do the rest for you. It will carry the whole serialization process behind the scenes. Manual Synchronization In manual synchronization, you can use many types of object to define your own synchronization mechanism. Examples of these objects are; "ReaderWriterLock", "AutoResetEvent", "ManualResetEvent", and "Mutex". DeadlocksDeadlock is a famous problem you can avoid simply by careful programming. To first explain what is deadlock, let us assume that we have two threads, thread 1, and thread 2. Let us assume, as well, that we have two objects, object x, and object y. If thread 1 holds a lock on object x and waits for a lock on object y, and thread 2 holds a lock on object y, and waits for a lock on object x then threads will be waiting forever! and this is what we call a deadlock situation. To solve this, use methods for synchronization that provides a timeout ability. You can for example use "Monitor.TryEnter" with a timeout parameter, to try to obtain a lock on a certain object within a certain time interval. Race ConditionsRace condition is a bug in your application, occurs when the result of your application depends on which one of two or more threads reaches a shared block of code first. In this case, the application output changes each time it is executed! As an example; assume that we have a shared integer object called x, and we have two threads 1, and 2. Thread number 1 attempt to increment the x object by one, and during this increment process, its time slice has been finished. Thread 2 time slice just start and it attempt to increment the same x object too. Thread 2 incremented the x object successfully, and then its time slice finished. Thread 1 starts a new time slice and completing the increment process not knowing that the object x value is already changed. This is a race condition, and the output of such code is of course incorrect! The above race condition problem can be solved by using an object like "InterLock", with its "Increment", and "Decrement" methods. Race conditions can be avoided generally by considering each line of code you write, and asking yourself: What might happen if a thread finished before executing this line? or during executing this line? and another thread overtook it? Tutorial toolbar: Tell A Friend | Add to favorites | Feedback | |