

Products
Database Search Solution (New Version) Search Control SEO Pager Highlighter Shortcut Controls Crypt Package Free ASP.NET Controls
Geotargeting Component ASP.NET Media Player Control Flash Video Player Control Services
ASP.NET Telecommute Jobs Free IP Location Lookup Test .Net Regular Expressions CSS/Table/DIV Page Layouts Custom Programming Article Sites Master List |
How to Place .NET Windows Forms Control To ASP.NET Web FormHosting Windows Controls on a web form is one of the interesting features of Visual Studio. This can be very useful actually, because we all know that creating Windows applications is sometime more flexible than Web applications. In Windows applications you have more control and you have access to a lot of .NET Framework classes that you don't find in Web applications. Clearly Drawing in a windows form is easier, accessing data and the way data is displayed are much different, etc... So to go about this, we will first create a simple Windows application, and I'll show you later on in this tutorial how
I will embed it within our page. We will use Windows Control Library instead of a new Windows application. 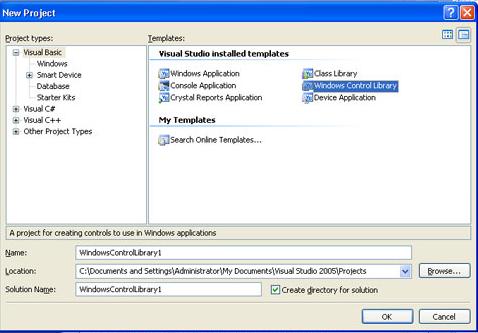 In the control library, insert a label into your form and save your changes.  Now close the solution and create a new website. 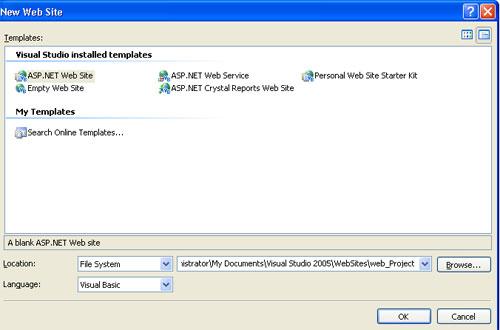 Now you will need your dll file produced in the previous project, copied to where your asp.net website is. 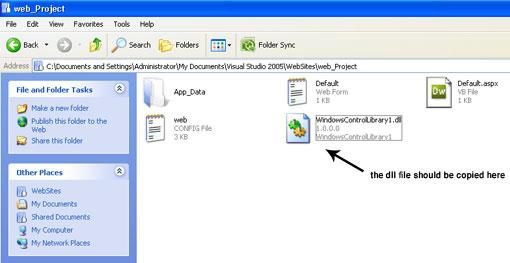 Now go back to your website in visual studio, and get the HTML code of the Default.aspx page. <!--
Code Starts Here -->
Save your changes and Run the site. An alert will be prompted to you asking wether to trust the dll file or not. 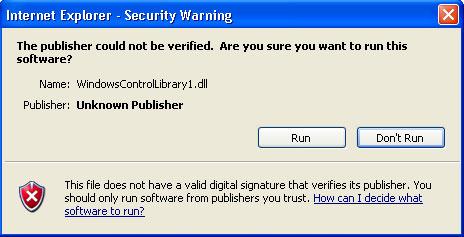 Click Run to allow the dll to be launched in Internet Explorer. 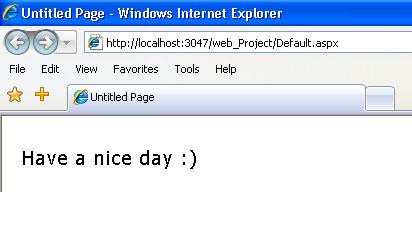 Congratulations, we were able to load the windows form to our web page. What you see on screen is a windows control label and not plane text. Now try it yourself, add more controls and functions to the Windows Control Library and test them out. There is sample Visual Studio .NET project, used in this tutorial. Some people also use this technique, and they attempt to change the content of the form within the .aspx page,
by changing values of properties and so on. This tutorial is written by Tea Maker. Tutorial toolbar: Tell A Friend | Add to favorites | Feedback | |