Products
Database Search Solution (New Version) Search Control SEO Pager Highlighter Shortcut Controls Crypt Package Free ASP.NET Controls
Geotargeting Component ASP.NET Media Player Control Flash Video Player Control Services
ASP.NET Telecommute Jobs Free IP Location Lookup Test .Net Regular Expressions CSS/Table/DIV Page Layouts Custom Programming Article Sites Master List |
Security Features in ASP.NET 2.0Security is an important attribute of any ASP.NET application. The authentication and authorization of users and resistance against the malicious attacks are important tasks in web applications. In ASP.NET 1.x introduced new authentication service called Forms-based authentication which involves authenticating users and redirecting unauthenticated users again to Login page. It also performs necessary cookie management. This kind of authentication was fine in many ways, but it required developers to build every element including Login page User Interface and create necessary tables to manage user accounts. ASP.NET 2.0 introduced a new membership and role management service that provides both authentication and authorization services and management of users who access your application with out building any tables or writing any code. To achieve this Microsoft implements extensible provider based security model in ASP.NET 2.0 Security ModelASP.NET 2.0 provides two providers in new security model
The extensible Membership provider framework can register and authenticate new users. Membership provider uses Microsoft SQL Server as the back-end data store. Role providers are used to manage user roles like creating new roles for users. This Provider based framework also includes new API that allows for programmatic access to both membership and role management services. Membership ProviderThe provider model in ASP.NET 2.0 provides pluggable architecture for developers to plug their own implementations for creating custom membership providers. The provider model begins with the abstract class ProviderBase. Inheriting from ProviderBase are the MembershipProvider and RoleProvider abstract classes. These classes add additional properties and methods to define the interface for their custom needs. Below listings should give you a concrete idea.
ASP.NET 2.0 ships with two membership providers: the SqlMembership provider and the AccessMembership provider. As name implies, SqlMembership provider stores membership information in a SQL Server database. Similarly, AccessMembership provider stores membership information in Access database. You can also create custom membership provider using any OLEDB DataSource or XML data source. But you need to implement all the methods and properties of the abstract MembershipProvider class. SqlMembership ProviderUnlike the Microsoft Access Provider, before you can use the SQL Provider you must create the necessary database tables and stored procedures. You can automatically create all of the required SQL Server database objects by executing the aspnet_regsql tool from the command line. This tool, by default, creates a new database named aspnetdb on your local instance of SQL Server. Let's see how to configure aspnetdb using aspnet_regsql tool in below series of listings. When we run aspnet_regsql from command prompt the following wizard opens up to configure aspnetdb database 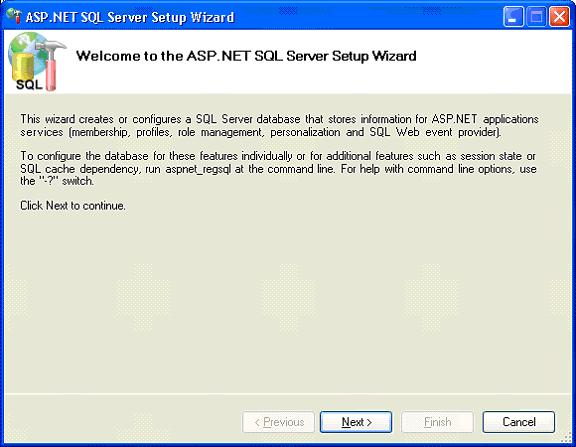 Click Next 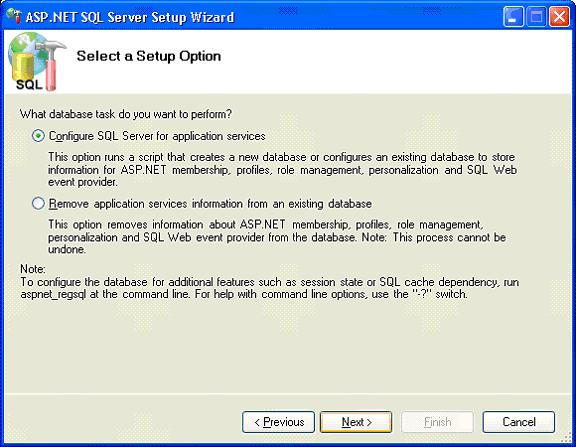 Choose Configure SQL Server for application services to create new database to membership information and click next 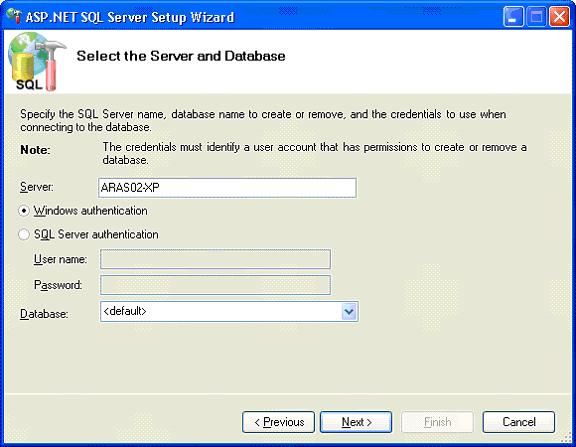 Specify the server name and authentication mode for membership database and click next 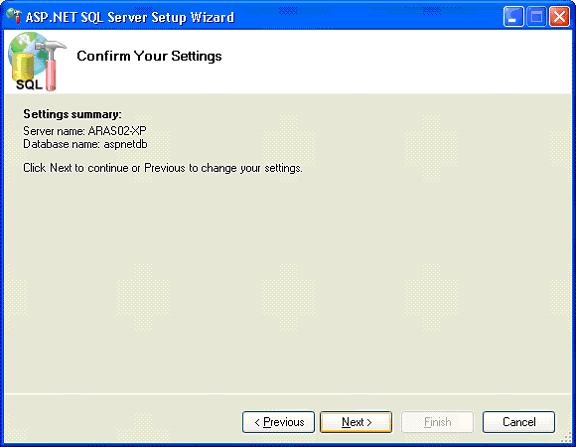 Summary of settings which you have specified and once you are done, click next 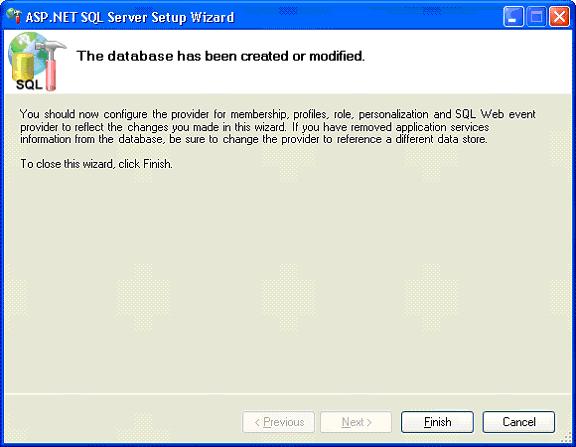 Database has been created and you can now configure the provider for membership. Click finish to end the wizard. After you create the new database, you'll want to make sure the database can be accessed by your ASP.NET application. You can find default membership provider settings for the server by looking at the machine.config file <membership> </membership> Configuring Membership Provider PropertiesThe SqlMembershipProvider support several provider specific attributes:
You can use these Membership Provider attributes to control how membership information is stored and retrieved from the database. The values of these attributes can be changed in your application's Web configuration file. For example: By default, the machine.config file configures membership and roles to work with a SQL Server Express database file in the App_Data directory. Looking back at the configuration listing above, we see the connectionStringName property is "LocalSqlServer". If you locate the connectionStrings section of machine.config you'll find the following: <connectionStrings> One you've configured a database for the provider to use, you can modify the web.config file for your application to redefine the LocalSqlServer connection string to point to the new database. <connectionStrings> Testing the Settings Using Web Site Administration ToolYou can also test above created settings with the ASP.NET Configuration tool. You can open the Web Site Administration Tool by selecting ASP.NET Configuration from under the Website menu. You can also navigate directly to the Web Site Administration Tool by requesting the special page WebAdmin.axd. For example, if your application is located in a virtual directory named MyWebApp on your local machine, you can open the Website Administration Tool for your application by entering the following URL in your Web browser. http://localhost/MyWebApp/WebAdmin.axd Web site Administration Tool is opened when you run the above URL in IE as shown below 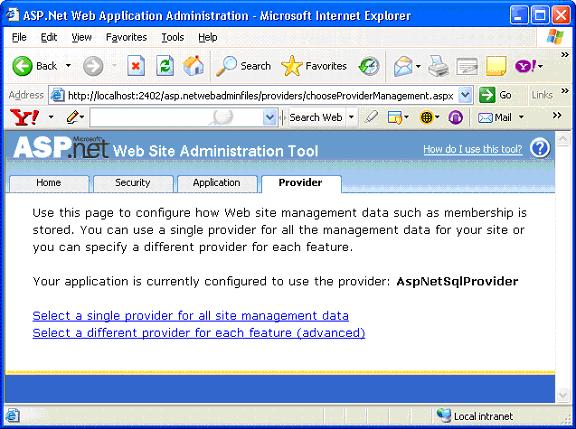 Click different provider for each feature link. We are referring SqlMembershipProvider as AspNetSqlProvider because it is named in machine.config. Refer to machine.config listing above 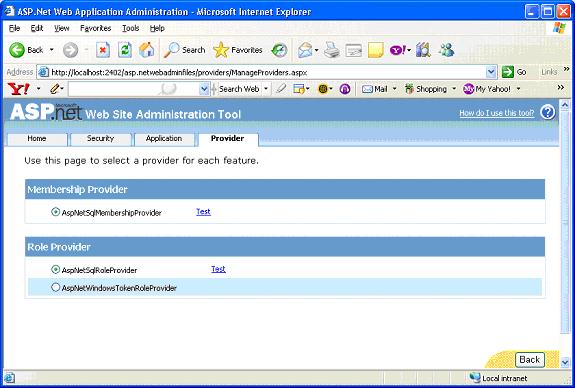 Click Test link if you want to test AspNetSqlMembershipProvider and once test is successful click back to return from web site administration tool. Login ControlsASP.NET 2.0 contains a new set of security-related controls, known collectively as the Login controls. By taking advantage of the Login controls, you can create standard registration, login, and password recovery pages without writing any code. By default, login controls integrate with ASP.NET membership and forms authentication to help automate user authentication for your Web site. The Login control, for example, will ultimately call the ValidateUser method of the current membership provider when a user enters their username and password and clicks the Login button. There is no need to write any code if the built-in controls provide all the functionality you need. All of the controls allow customization various levels of customization through styles and templates. You can find the controls in the Visual Studio toolbox under the "Login" category. Behind the scenes, the Login controls take full advantage of the Provider Model. If the SqlMembershipProvider is enabled, the configured SQL Server database is used by the controls. Before using any of the Login controls, you should enable Forms Authentication for your application. You can enable Forms Authentication by modifying your application's Web configuration file, or by using the Web Site Administration Tool. Different Login and Password server Controls:
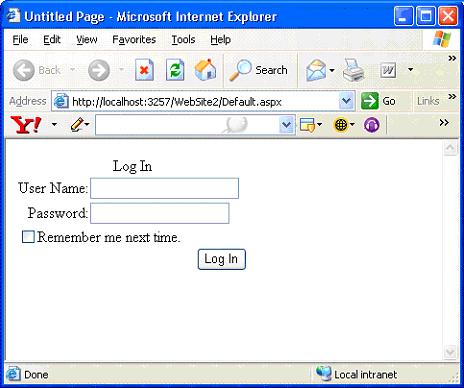
CreateUserWizard server control enables you to plug registered users into your data store for later retrieval. LoginStatus Server control enables users to click a link to log in or log out of a site. LoginName server control enables you to display the username of the authenticated user. PasswordRecovery control enables to retrieve password for the user. ChangePassword as the name implies allows changing the password for the user. Login server control provides Login mechanism for application. Login Server ControlThe Login server Control display standard login interface for user authentication. The Login control can be used as a standalone control on a main or home page, or you can use it on a dedicated login page. If you use the Login control with ASP.NET membership, you do not need to write code to perform authentication. However, if you want to create your own authentication logic, you can handle the Login control's Authenticate event and add custom authentication code. Create an ASP.NET Web application that uses ASP.NET membership. Create an ASP.NET Web page in your application named Login.aspx. By default, ASP.NET forms authentication is configured to work with a page named Login.aspx. You can change the default login page name in the Web.config file for your application using the LoginUrl property. Following example shows the markup for a Login control: <asp:Login ID="Login1" runat="server" DestinationPageUrl="~/MembersHome.aspx"> </asp:Login>
When you submit your username and password by using the Login control, your credentials are automatically validated by the configured Membership Provider. Login Control properties
CreateUserWizard ControlThe CreateUserWizard control enables you to create a standard user registration page. You can use the CreateUserWizard control to allow users to create a new user entry in the membership system. The exact appearance of the interface generated by the CreateUserWizard depends on the settings of your application's Membership Provider. For example, the text boxes for a password question and answer appear only when the default Membership Provider's requiresQuestionAndAnswer attribute has the value true. 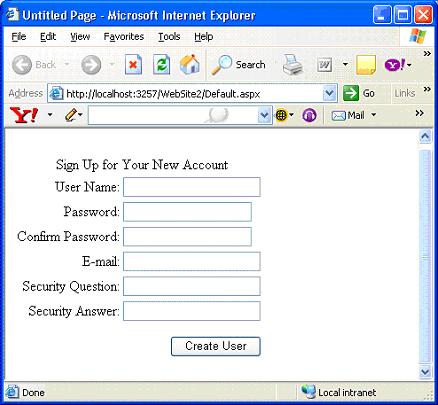
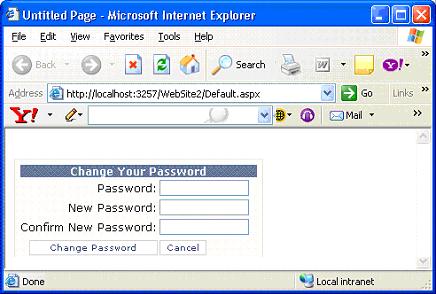
One of the interesting things that you can do with the CreateUserWizard control is to automatically send a registration e-mail message after the user has completed all of the registration steps. ChangePassword ControlThe ChangePassword control enables users to change their passwords. ¸ The control displays text boxes for entering the original password and entering a new password
Like the CreateUserWizard and PasswordRecovery controls, the ChangePassword control includes a MailDefinition property. When values are assigned to the MailDefinition property, the ChangePassword control automatically sends an e-mail message to the user when a password is successfully changed. LoginName and LoginStatus ControlsThe LoginName and LoginStatus controls enable you to display information about the current authentication status of a user. After a user has logged onto your application, the LoginName control displays the user's registered username. If a user has not been authenticated with Forms Authentication, the LoginName control displays absolutely nothing. <asp:LoginName ID="LoginName1" Runat="server" /> The LoginStatus, on the other hand, enables a user to log in or log off your Web application. The control displays one of two links. If the user is not authenticated, a link to the Login.aspx page is displayed. If the user has already been authenticated, a link that enables the user to log off is displayed. Here's how you declare the LoginStatus control. <asp:LoginStatus ID="LoginStatus1" Runat="server" /> LoginView ControlThe LoginView control enables you to display different content depending on the role of the current user. For example, many Web sites display different information on their home page, depending on whether the user is a new user or a registered user. New users might get an overview of the purpose of the Web site, while registered users can view information that is customized for them. ConclusionThe ASP.NET 2.0 framework includes significant new security features which make the life of developer a lot easier. The new Web Site Administration Tool enables you to create and manage users entirely through a Web form interface. The new Login controls enable you to build standard Web site security pages without writing a single line of code. Finally, the Membership API provides you with a powerful set of methods for manipulating membership information through code. Tutorial toolbar: Tell A Friend | Add to favorites | Feedback | |