|
Products
Database Search Solution (New Version) Search Control SEO Pager Highlighter Shortcut Controls Crypt Package Free ASP.NET Controls
Geotargeting Component ASP.NET Media Player Control Flash Video Player Control Services
ASP.NET Telecommute Jobs Free IP Location Lookup Test .Net Regular Expressions CSS/Table/DIV Page Layouts Custom Programming Article Sites Master List |
ASP.NET 2.0 To-Do ListIt is very easy to build To-do list web application in ASP.NET 2.0. This tutorial will cover the basics of using .Net 2.0's controls and fundamentals of using Visual Web Developer to create a simple, but powerful application. There is sample To Do List ASP.NET 2.0 project, used in this tutorial.
Prerequisites:
Start Visual Web Developer Express and select New Web Site from the File Menu. The New Web Site dialogue will appear. Verify ASP.NET is selected and click OK. 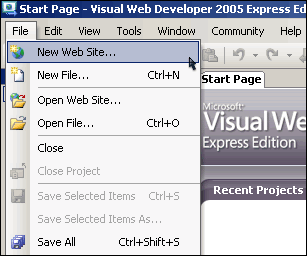 In this tutorial, you will become familiar with the Visual Web Developer Toolbox. Please take a moment to briefly scroll through the listing of items. 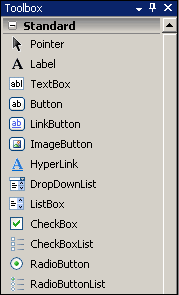 Once you have viewed the Toolbox, switch into Design View by clicking Design.  Right-click the App_Data in the Solution Explorer window and choose Add New Item. Select SQL Database from the template items and name it ToDoData.mdf. Click Add. 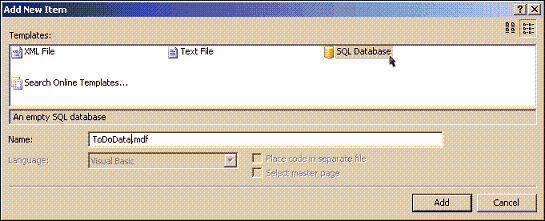 After the database is created, the Database Explorer will take focus. Right-click the Tables Folder and select Add New Table. 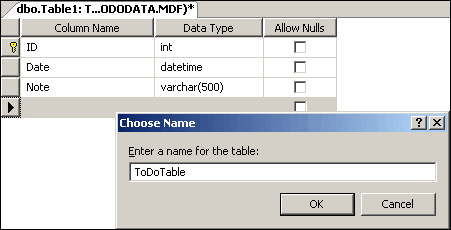 Create three columns: ID, Date, and Note. Right-Click the ID Row and Select Set Primary Key. In the ID's Column Properties, select Yes for (Is Identity) under the Identity Specification. Duplicate the columns' Properties and Data Types in the figure to the right and press Ctrl+S. Name your table ToDoTable and click OK. The SQL database is available for data entry. Click the Default.aspx tab to return to your Web Form. From the Data group in the Toolbox, drag a SqlDataSource control onto the page. On the SqlDataSource Tasks shortcut menu, select Configure Data Source. Select ToDoData.mdf from the data connection drop-down menu. Click Next >. Verify the checkbox is selected, and save the connection as ConnectionString. Click Next >. Check [*] in the columns display. Next, select the Advanced button and check Generate INSERT, UPDATE, and DELETE statements. Click OK. Click Next >. Click Finish. You have successfully configured your data source. From the Data group in the Toolbox, drag a FormView control onto the page. On the FormView Tasks shortcut menu, choose SqlDataSource1 from the drop-down menu. 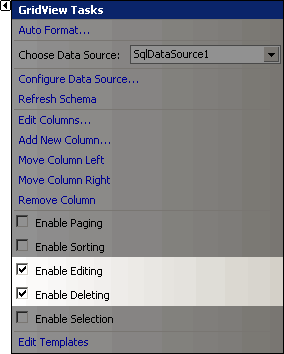 Next, drag a GridView control onto the page from the Data group in the Toolbox. On the GridView Tasks shortcut menu, choose SqlDataSource1 from the drop-down menu. Check Enable Editing and Enable Deleting. Open Default.aspx.vb from the Solution Explore panel
and paste the following code (replace the current script). Partial
Class _Default Return to Default.aspx. Press F5 to preview the product in your browser. Congratulations. Your finished product will resemble the figure below: 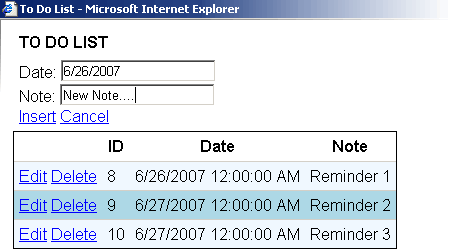 Tutorial toolbar: Tell A Friend | Add to favorites | Feedback | |

