

Products
Database Search Solution (New Version) Search Control SEO Pager Highlighter Shortcut Controls Crypt Package Free ASP.NET Controls
Geotargeting Component ASP.NET Media Player Control Flash Video Player Control Services
ASP.NET Telecommute Jobs Free IP Location Lookup Test .Net Regular Expressions CSS/Table/DIV Page Layouts Custom Programming Article Sites Master List |
Working With COM/COM+ in ASP.NETMicrosoft introduced a new concept called managed code. Code that runs within the CLR environment is called managed code. Code that runs outside the boundaries of CLR environment is called unmanaged code. Some of the example of unmanaged code are COM, ActiveX components. .NET provides a mechanism which makes it possible to use the existing unmanaged components with ASP.NET application. This mechanism is called interoperability. Introduction to COM/COM+COM is a binary standard. It is acronym for the Component Object Model. COM is a specification and the components built in any language according to this specification (COM) can be integrated with any client application written in any language. The Client doesn't has to know the location of the components. When working with COM, the objects are compiled into DLLs i.e. the binary executable files. A DLL can contain more than one class. COM+ is nothing but an extension of COM. COM+ is a combination of operating system services and an object oriented programming architecture. By extension to COM, I meant of adding a few services, like event registry, the queues of asynchronously received requests for a service (transaction management), ensuring security against the system requests (authentication), object pooling. Invoking COM/COM+ componentsIn .NET, all codes are executed within the Common Language Runtime (CLR) environment. CLR runs your code and specifies services required for the development process. ASP.NET application cannot directly interact with COM components. When an ASP.NET application calls a method defined in the COM component, CLR creates a wrapper called Runtime Callable Wrapper (RCW). RCW is a .NET object and is executed in CLR. The primary task of RCW is to marshal calls between the >NET application and the COM components. The CLR only creates one RCW object for a COM component even if it is referred more than one time in an application. RCW stores the number of references attached to it in an internal cache. RCW is created on the heap and so is subjected to garbage collection. When reference count to a particular RCW becomes zero, the garbage collection module will delete it and the memory allocated to the RCW object will be released. When an ASP.NET application calls a method defined within the COM component, RCW performs the following tasks:
The following figure displays the process of invoking a COM component from .NET application:  In this section you will add a COM component to an ASP.NET application. For example to add a COM component, perform the following steps: 1. Open new project and select Visual C# projects from the Project types pane and ASP.NET Web Service from the templates pane. 2. Select Project->Add References. The following dialog box appears: 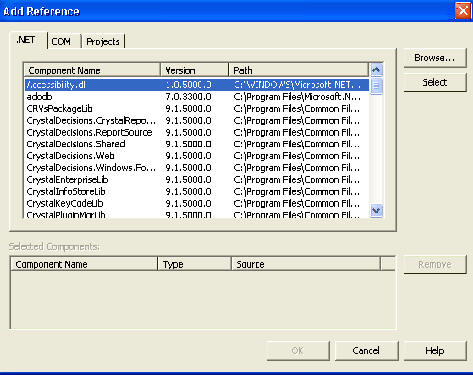 4. Click the COM tab in the Add Reference dialog box. A list of COM components is displayed. 5. Select the COM component that you want to use within your ASP.NET application. For example, select the Microsoft ActiveX Data Objects 2.7 library option form the list and double click the Select button. The component is added to the Selected Components pane, as displayed in the following figure: 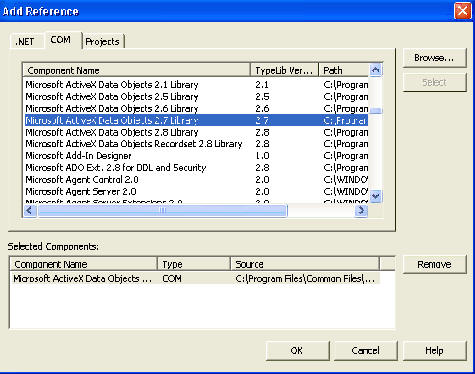 6. Click the OK button. The component that you have added to the project is displayed in the Reference node in Solution Explorer. 7. You can use the COM component in the application by specifying its library class, as follows:
You can use this COM object rs, in your application to call its method. Create your own COM/COM+In this section, we will laern about creating your own class that can be used as a COM/COM+. Perform the following steps for the same: 1. Create a new project and from the templates pane select, Class Library. 2. Next step is to create a n interface. But it is essentila here to include the GUID and the ComVisible interface. All you need to do for this give the value true to ComVisible and for GUID, go to tools in menu bar and select "create GUID". The following window will appear, now select the Registry format option and click copy. Now go to your code and click paste. Remember to remove the braces {}. Thus add the following lines of code: [Guid("6B8551ED-6468-48c9-BE12-5766DDA8B20D")] 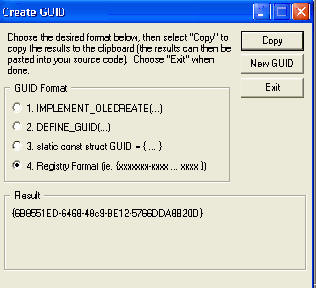 3. Now declare your class. Your class should inherit from ServicedComponent and your interface. For this you must include System.EnterpriseServices. Thus the declaration should be like: public
class myclass :
ServicedComponent, myinterface But its essential to register your component before using it as COM/COM+. To do this use RegAsm utility Tutorial toolbar: Tell A Friend | Add to favorites | Feedback | |