

Products
Database Search Solution (New Version) Search Control SEO Pager Highlighter Shortcut Controls Crypt Package Free ASP.NET Controls
Geotargeting Component ASP.NET Media Player Control Flash Video Player Control Services
ASP.NET Telecommute Jobs Free IP Location Lookup Test .Net Regular Expressions CSS/Table/DIV Page Layouts Custom Programming Article Sites Master List |
ASP.NET Identity, Membership and SimpleMembership ComparisonMany web applications require a way to recognize a user, and depending of user's rights allow or disallow access to website features or areas, load personal user's settings, save data, documents etc. Membership system is very important part, but also hard to create from scratch and potentially dangerous because of security issues. Common web developer would rather concentrate on main business, instead of worrying about security and membership. Fortunately, ASP.NET development team is aware of this need, and until now offered several methods that could be used to add user membership system in ASP.NET web application. Each approach is better than previous one, and each was trying to improve and resolve problems in previous version. ASP.NET Membership system is published first. It is introduced with ASP.NET 2.0. in 2005., as a standardized way to enable user authentication in ASP.NET applications, instead of custom solution. After that, we got SimpleMembership in 2008., mainly for use with ASP.NET MVC. And finally, we have ASP.NET Identity. Since user management problem is important, many developers could not wait for Microsoft to do things on right way and created many third party are many third party solutions, in addition to Microsoft's solutions. ASP.NET Identity is latest membership technology. Its purpose is to replace previous Membership and SympleMembership systems, so both Membership and SimpleMembership become obsolete now. But, new membership is not backward compatible. ASP.NET identity works only with .Net Framework 4.5 or later. If for some reason you must use .Net Framework 2.0 or 3.5 then you have to stay with old Membership or SimpleMembership systems. New ASP.NET Identity is released as NuGet package and also included by default in Visual Studio 2013. Publishing in form of NuGet package helps to obtain new versions easier in the future. ASP.NET Identity is located in Microsoft.AspNet.Identity.Core namespace. Characteristics and problems in old ASP.NET Membership systemThere are many problems with old ASP.NET Membership system. But, at time when it's published it was great help, when compared with idea to create complete membership yourself. During the time, programmers noticed its flaws. First, ASP.NET Membership system is hard to customize. It uses SQL Server database only to store data about users. It has predefined user's information table that will be stored. It is not simple to extend default functionality and add custom user fields, or to move data to other kind of database. Membership database schema is designed for SQL Server only. It is hard to move data to other data sources, especially to non-relational databases. Second, Sign-In and Sign-Out are implemented based on Forms Authentication, so classic Membership system can't use OWIN. These problems are fixed in new ASP.NET Identity membership which has easier customization of user profiles, simple change the data storage and also it's not depending of IIS. Traits and problems of ASP.NET SimpleMembership systemSimpleMembership is second implementation, which was introduced with Visual Studio 2010 SP1 and WebMatrix. One advantage of SimpleMembership over classic Membership system is that it's easier to customize user profiles. But, all other problems like using membership system on other kind of databases, using of external membership providers, working with OWIN etc., are still there. Also, SimpleMembership is made primarily for MVC. Web Forms applications still used old ASP.NET Membership system which just increased complex and useless burden on common ASP.NET developer. ASP.NET Identity new features and advantagesASP.NET Identity membership is newest approach to make membership system on right way. It solves previous problems and also support newest demands, like external login with existing Facebook, Google, Twitter or Live login. Here are most important advantages of ASP.NET Identity:
Obviously, new websites should use ASP.NET Identity since it provides far more benefits than previous membership systems. How to implement ASP.NET Identity with new ASP.NET websiteProcedure for Web Forms application is same as procedure for MVC application. It is pretty simple to implement ASP.NET Identity feature by using Visual Studio 2013. Open Visual Studio and press Ctrl + Shift + N on keyboard to open new project window (or alternatively click File -> New -> Project... on top menu). Select ASP.NET Web Application like on image bellow: 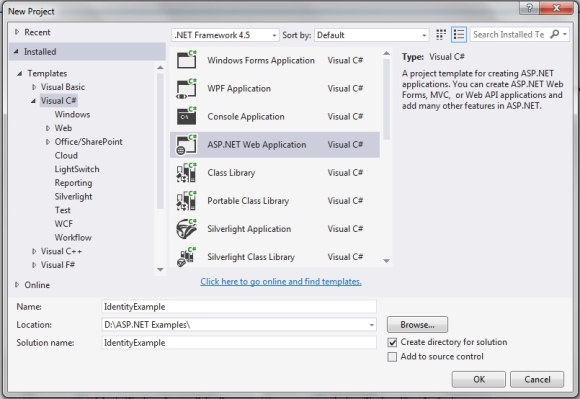
Choose project name and project location, and press OK button. On the next screen, window is divided on two parts. On left side, select type of ASP.NET application, like Web Forms, MVC, Single Page etc. On right side you can select authentication method: 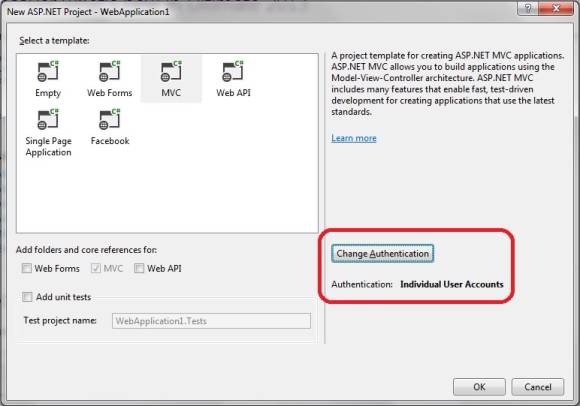
Click on Change Authentication button to see available options. To use ASP.NET Identity, make sure that Individual User Accounts option is selected. 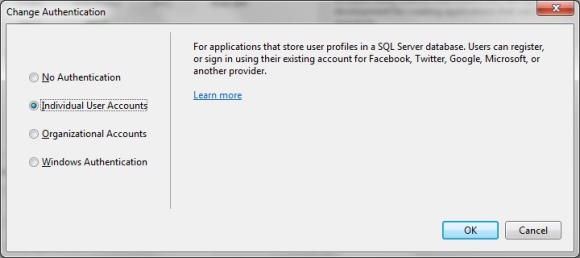
First option "No Authentication" obviously means that web application will not need any kind of authentication. Last two options are for using of Azure or Windows Active Directory. Now you can start web application to see how authentication works. Use Register link on top of the page, like on the image bellow: 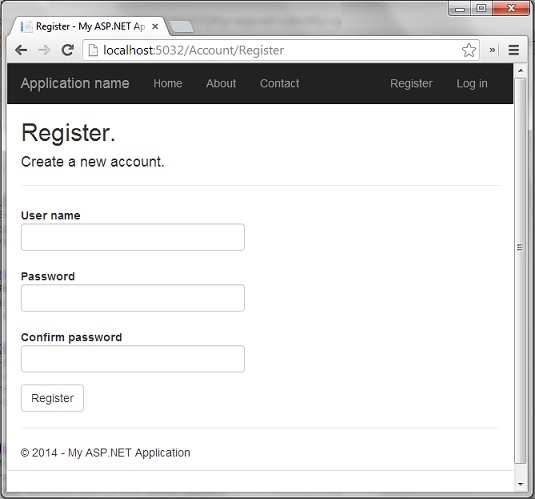
After registering, you can login any time by using Login link. By default, users data are stored in local database, inside of App_Data folder. Social Networks Authentication with ASP.NET IdentityAs you can see, only few clicks is needed to have ASP.NET Identity implemented in ASP.NET website. Next step is to customize it according to your specific needs. One of the new demands is to enable logins from social networks websits. When classic ASP.NET memebership was published, all users are registered to websites with new account and stored in local database. Nowadays, users expects an option to login by using their existing Facebook, Google, Twitter, Microsoft Live and other accounts. By using ASP.NET Identity, you can easily add this feature to your ASP.NET web application. One more advantage of using external logins is that you don't have to store user names and passwords locally so you don't need to worry about keeping them secure. Social networks websites use HTTPS login pages and take all care about security. Code for Facebook, Google, Twitter and Microsoft Live login, the four of the most popular external providers is located in App_Start\Startup.Auth.cs file. Let's see how to enable external login from these services. How to enable login to ASP.NET website by using Google accountWith ASP.NET Identity, it is very easy to enable users to register with existing Google account. Open StartUp.Auth.cs inside of App_Start folder and uncomment Google authentication section, like on image bellow: 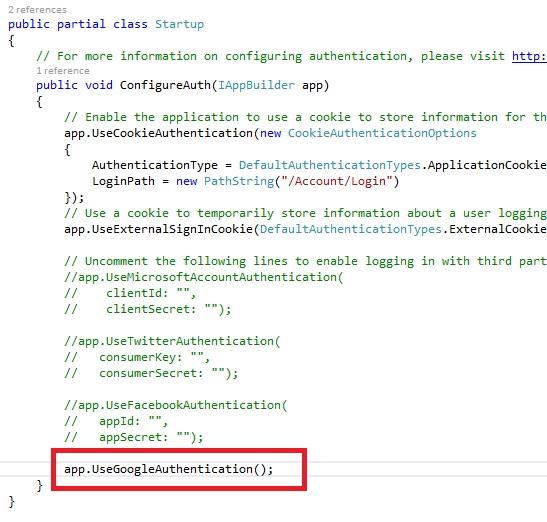
Start web application again and click on Login link. On right side, now you can see the new section named "Use another service to log in", and a button "Google". After click on Google button you will be redirected to http://accounts.google.com to login, and then redirected back to your website to choose user name. Congratulations, you just enabled Google account login on your website. Yes, it is that easy :). How to enable logins to ASP.NET website by using Facebook accountsTo enable Facebook logins, we need a little more work. Go to https://developers.facebook.com/apps and register as a developer. Click "Create a New App" button. New dialog will appear where you can type application name and select category. Optionally, write namespace. Click "Create App" button. You will be redirected to control panel of your application where you can see a lot of interesting things which you can browse from a menu on left side. For now, we need "App ID" and "App Secret" fields (click Show button to see App Secret). Now, go back to Visual Studio and open App_Start\Startup.Auth.cs file. Uncomment Facebook code snippet, marked on image bellow: 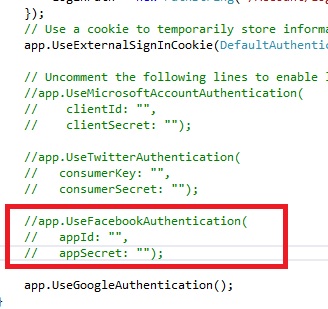
Add values for appId an AppSecret, like on Facebook application control panel. When you start web application, click Login link, you will see new Facebook button on right side. But, if you try to login now, you will get an error: Given URL is not allowed by the Application configuration.: One or more of the given URLs is not allowed by the App's settings. It must match the Website URL or Canvas URL, or the domain must be a subdomain of one of the App's domains. Go again to application control panel, click Settings on left menu, and then Add Platform button. On dialog, select Website option. Fill "Site URL" text box to tell Facebook a domain name where it will accept logins. Be careful to type exact domain name, including http:// and everything else. If you test on localhost by using Visual Studio, type port number too (e.g. http://localhost:5032/ ). Small problem with Facebook is that you can choose only one domain name for your application, so you can't use same application name on live URL and localhost at the same time. How to enable logins to ASP.NET website by using Twitter accountsThe procedure is similar like on Facebook. First, go to https://dev.twitter.com/apps. Login and then click "Create a new application" button. Like Facebook, Twitter also requires application name and URL. But, Twitter doesn't allow you to use http://localhost. For testing purposes, you can choose local IP address, and URL could look like http://127.0.0.1:5032. To use local IP address you have to have IIS installed. If, for any reason, Visual Studio changes used port when debugging, you have to change it on Twitter control panel too. Now, uncomment Twitter code snippet in Startup.Auth.cs, marked on image: 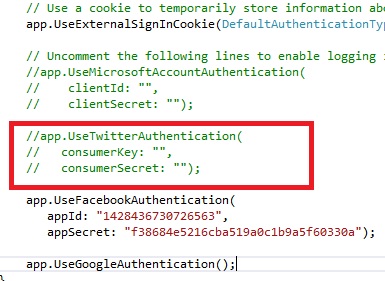
Set values for key and secret and run web application. Click Login and you will see one more login button "Twitter" on right side. How to enable Microsoft Live accounts to login on ASP.NET websiteLike for Facebook and Twitter, Microsoft Live also requires you to have application's ID and secret keys. To do that, go to https://account.live.com/developers/applications/create. Choose your new application name and submit the form. On next screen you get client ID and client secret. Follow the process and finally activate application. Copy those keys in startup.auth.cs file. Before that, uncomment Microsoft's part, like on image bellow: 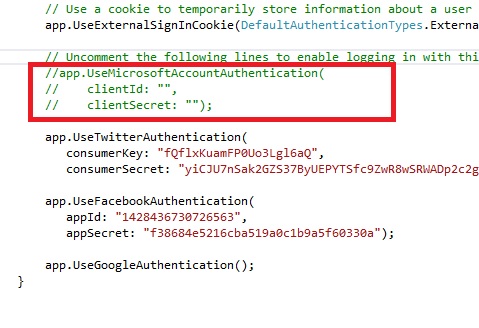
Run the website again, and you should get one more, "Microsoft" login button. Now your website should be able to accept logins from existing accounts of four big social networks. By looking from marketing angle, this can be huge improvement to convert all those hesitant prospects into customers. How to test website login on production server and development computers without changing data in Facebook, Twitter and Microsoft control panelsAs you see, all these external login systems allows only one domain name per application, so you must change it from testing address to your production domain name when application is live. But, after deployment you still need testing and is not acceptable to switch URL back to localhost since live application will be inaccessible for users. Here is simple trick how to use same URL for both production and development servers: Open file named hosts, which is located in C:\WINDOWS\system32\drivers\etc\ Now, IP address 127.0.0.1 will be translated when accessed locally to your domain name, so you can use same domain for both testing and production. ASP.NET Identity 2.0.ASP.NET Identity 2.0 includes several new features like Two-Factor Authentication, Account Lockout, Account Confirmation, Password Reset, Security Stamp (Sign-Out Everywhere) and more. Before, these features had to be coded, so now developers can focus more on main business while using tested and standardized method to manage users. Also, bugs discovered in previous version are fixed so ASP.NET Identity 2.0. should be more stable. ConclusionMicrosoft listened developers' feedback and provided membership system which solves many problems found on previous systems. ASP.NET Identity is customizable, can work with different data sources, supports social networks authentication and change fields in user profile. ASP.NET Identity 2.0 is more stable and includes new features. ASP.NET finally has everything needed to very quickly create secure and feature-rich website membership system. Tutorial toolbar: Tell A Friend | Add to favorites | Feedback | Google |