

Products
Database Search Solution (New Version) Search Control SEO Pager Highlighter Shortcut Controls Crypt Package Free ASP.NET Controls
Geotargeting Component ASP.NET Media Player Control Flash Video Player Control Services
ASP.NET Telecommute Jobs Free IP Location Lookup Test .Net Regular Expressions CSS/Table/DIV Page Layouts Custom Programming Article Sites Master List |
Introducing to Help System in .NETWhile using an application, a user might need help on performing an operation or require information about a button or a dialog box. To assist the user while using the application, it is a good practice to provide help system with the application. In this article, we will discuss the creation of a help system using HTML help workshop. We will also discuss the creation of Context-Sensitive help, pop-up help and tool tips. Help FilesA help system is made up of several different help files and components that are created using HTML Help Workshop. HTML Help Workshop (hhw.exe) is a help-authoring tool provided by Microsoft for creating help systems. Some of thee files that make up help system are: HTML Files: These files contain the text that appears on each page in your Help System or web site. Graphics and Multimedia files: These files contain links to graphic, sound, video, animation and other files. Help Project Files: These files contain information about the location of your topic, graphic and other files. Content Files: These files contain the information that appears in the table of contents for your help system or web site. Index Files: They contain the information that appears in the index for your help system or web site. The HTML help Workshop allows you create a help system with standard features of any help system like: Table of Contents: A table of contents provides users with a hierarchical view of the various help topics. Index: An index help users to quickly search for information they need. The files in the help system are managed by creating a help project file. Building a Help SystemTo build help system, the following steps need to be performed: 1. Create a project file I. Create a Project FileFollow the following steps: 1. Click Start->All Programs->HtmlHelpWorkshop->HTML Help Workshop. The interface for HTML Help Workshop is shown below: 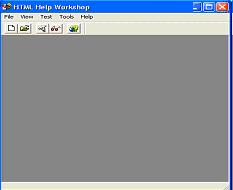 2. Select File->New. The New dialog box is displayed: 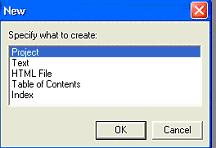 3. Select the project option and click OK. The first screen is shown below: 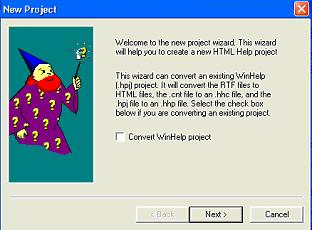 4. Click Next button. The new project-Destination screen is displayed. Enter the name of the project and the path where you want to create the project, as shown and click next. Note that the file has extension of hpp. 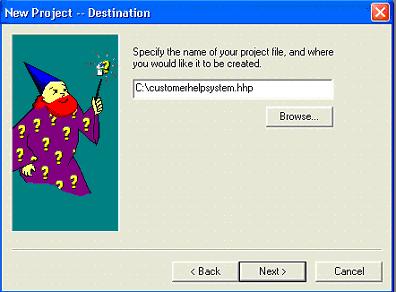 5. In case you have some existing files that you want to include in your help project, select the types of file and then click the next button. 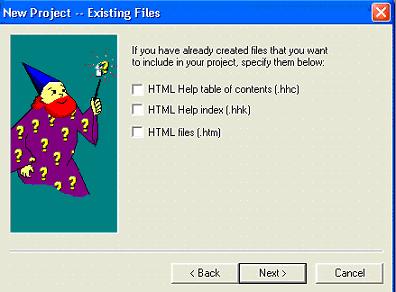 6. Click Finish on the next screen. The following screen is displayed. The project tab is active by default. 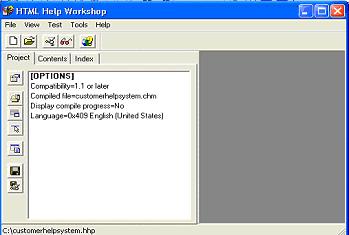 II. Create HTML Topic PagesOnce the project file has been created, HTML topic pages need to be created for each help topic. Topic pages are created in HTML format. To create topic pages, the following steps need to be performed: 1. Select File->New. The new dialog box gets displayed. 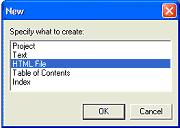 2. Select HTML file and click Ok. In the HTML dialog box, enter the title for the HTML page and click the OK button. 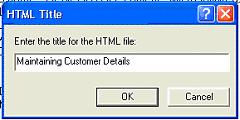 The outline of the HTML page is displayed as shown in the figure: 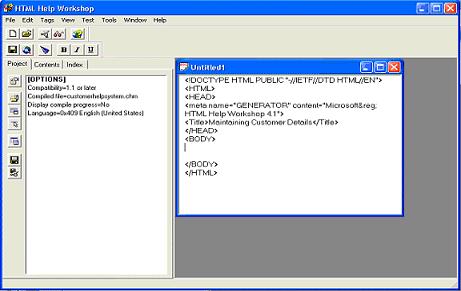 3. Write the help text within the <body> </body> tag in the HTML source page in the right pane of the window and save the HTML page. It will look like the one below: 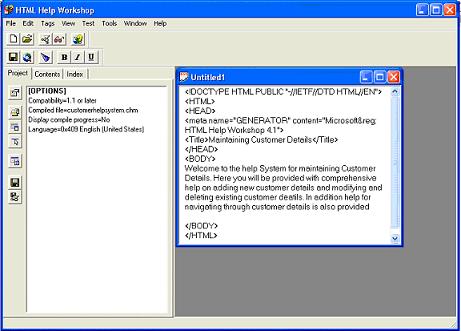 Save the HTML file by clicking the save icon on the toolbar. III. Create an Index1. Click the index tab. A message box, as shown below is displayed asking whether to create a new index file or open an existing one. 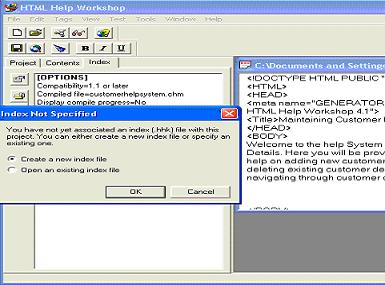 2. Select the Create a new index file radio button and click OK. 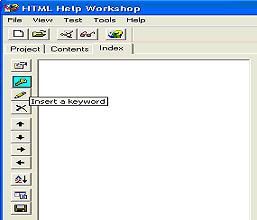 The Index Entry dialog box is displayed: 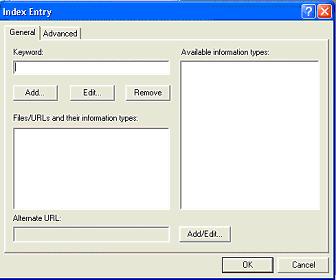 5. Type a search keyword in the keyword text box and click the Add button. The Path or URL dialog box is displayed. 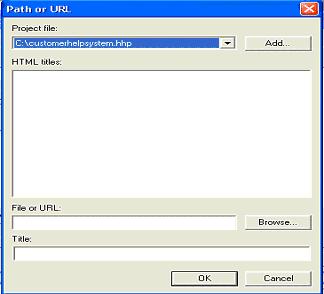 By default, the currently open help project is displayed in the project file list box. 6. Enter the HTML file to be associated with the keyword by entering
the file name in the File or URL text box or by selecting the file by using the Browse button
and click the OK button to go back to the Index Entry dialog box. Repeat the above steps for assigning keywords to each help topic. A sample index with two keywords is shown below: 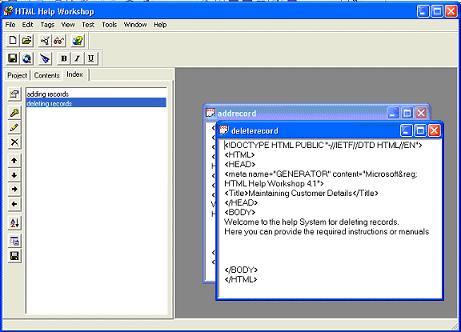 IV. Create a Table of Contents1. Create a new contents file a. Click the contents tab. A message box as follows will be displayed: 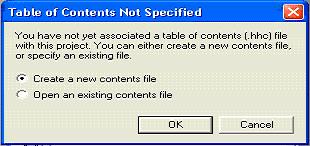 b. Select Create new and click OK. 2. Add a heading to the table of contents After creating a new contents file, you need to add a heading to the table of contents. A heading groups various related help topics under it. To create a heading, the following steps need to be performed: a. Click the Insert a Heading icon in the contents tab in the toolbar. This icon is shown in the figure  b. The Table of Contents entry dialog box appears.
Enter a heading title in the Entry title text box and click the Add button.
The file or URL dialog box opens.
Enter the filename in the file or URL text box and click the OK button to go back to the table of contents
entry dialog box. 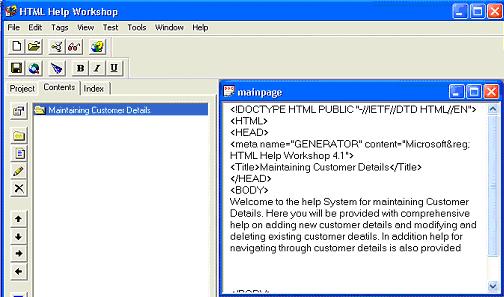 3. Insert Related Topic Pages After the heading has been created, the related topic pages need to be inserted. To create a topic page, the following steps need to be performed: a. Click the Insert a page icon in the contents tab in the toolbar. This icon is shown in the figure  b. A message box will be displayed asking whether you the page is to be displayed at the beginning of the table of contents file. c. Click the No button if you want to insert the entry under the corresponding heading. Clicking the Yes would result in the topic being added to the top of the table of contents. The table of contents dialog box appears. Follow the same procedure that done for the index. A sample table of contents with 2 help topics (adding records, deleting records) is shown below:  You can specify a default HTML file for your project. When the help file is displayed to a user, the HTML file is set as the default file for the project is opened and displayed automatically. To set a default file for the project, click the project tab and then click the change project options icon from the toolbar. It looks like the one shown below as shaded blue. 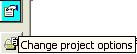 The option dialog box is displayed: 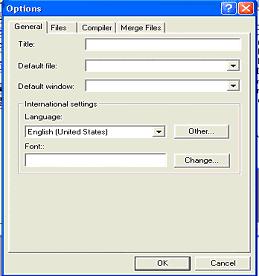 Enter the name of the file that you want to set as the default file in the default file combo box and click the OK button. V. Compile the Project File1. Select File->Compile. The Create a compiled file dialog box is displayed. By default, the path of the current project file is displayed inn the Project File combo box. 2. Select the first check box to save all the created files before compiling the project, select the second check box to specify that the compiled help file be displayed automatically when the compilation is complete. 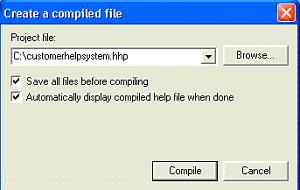 3. Click the compile button to start compiling the project file. The project file is compiled as .chm file. After the compilation is complete, the compiler information is displayed, as shown below: 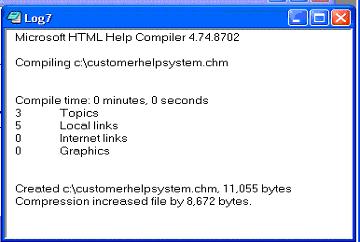 Implementing HelpWhen running an application, a user might need help on the function of a user interface element. The user should be able to access the help system by pressing the F1 key. To provide help for an application, you need to link it with a help system. A help system can be associated with your Windows application with the help of the HelpProvider control. Providing Context Sensitive HelpContext Sensitive help assists users by providing help based on a specific dialog box or control in a program. This enables users to get specific about whatever part of the program they are using at any given moment. Add a HelpProvider control to the form. To add a context-sensitive help, following properties need to be set:
To implement context-sensitive help, the following steps need to be performed: 1. Link your application with a help file. 2. Add context sensitive help to various form elements. 1. Link your Application with a Help Filea. Open your form in design mode and drag a HelpProvider control. 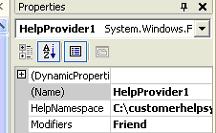 2. Add context sensitive help to various form elements.a. Open the properties window of the form. Set the ShowHelp on HelpProvider1 property to true, as shown in the figure. This will display help for the control at run time. 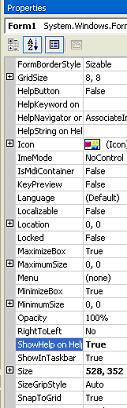 3. Enter a search keyword for the HelpKeyword on HelpProvider1 property and appropriate value for the HelpNavigator on HelpProvider1 as shown in the figure. 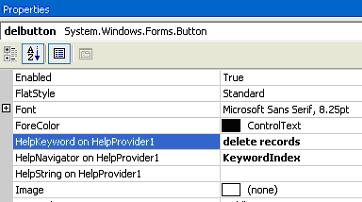 Pop-up helpPop-up help can be provided in an application through the Help button, also called the What's This button, present in an application to the right of the title bar. The poop-up help is most effective in modal dialog boxes. Modal Dialog boxes are the ones that are displayed using the ShowDialog() method. These boxes do not have maximize or minimize button, as normally forms have. You can see a question mark sign on the top right corner of the form in the figure given below. When you click on this question mark, your mouse pointer will carry '?' sign along, and when you click any control the associated help with that control will be displayed. Consider the following figure. 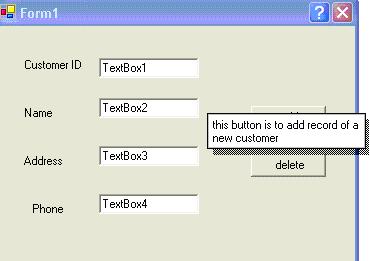 The way to implement this is discussed below: 1. Set the MinimizeBox and MaximizeBox properties of the form to true. Implementing Tool-TipsA tool tip is a brief message for individual controls on a form. Tool tips are generally used for displaying help for toolbar icons. They can be displayed by using the Tooltip control present in the toolbox. The user can access a tooltip by pointing at the control for which the tool tip can be created. They appear when you place your mouse over a control for some time. To display a tool tip, you need to add a ToolTip control to the form and enter the text in the ToolTipText property of the control for which the tool tip is to be displayed. The tooltiptext property can be used to set the tool tip for a StatusBarPanel control, a ToolBarButton control, and a selected tab. You do not need to insert a ToolTip control in the form for these controls. But for others you will have to. Consider the following code to set a tool tip text for a ToolBarButton control programmatically: Toolbarbutton1.ToolTipText="Add a record" Consider the following code to set a tool tip text for a Button control programmatically: ToolTip1.SetToolTip(Button1, "Add a record") The SetToolTip() method of the ToolTip control is used to set the tool tip text for a control. This method takes two parameters, the control for which the tool tip text is to be set and the tool tip text to be displayed for that control. Some of the important properties of the ToolTip control are: Active: This property is used to set the current status of the ToolTip control. The property can be set to either True or False. By default it is true. AutomaticDelay: This property is used to set the time in milliseconds after which the tool tip would appear. By default, the AutomaticDelay property is set to 500. The three properties of the ToolTip control that have their values based on the value of AutomaticDelay property: 1. AutoPopDelay: This is used to set the time period for which the tool tip is displayed on the screen when the mouse pointer is stationary in a tool tip region. When the AutomaticDelay is set, the AutoPopDelay is automatically set to 10 times of the value of AutomaticDelay, although it can be overridden. 2. InitialDelay: This is used to set the time period for which the mouse pointer should be stationary in a tool tip region before the tool tip appears. When the AutomaticDelay is set, the AutoPopDelay is automatically set to the value of the AutomaticDelay, although it can be overridden. 3. ReshowDelay: This is used to set the time taken by the subsequent instances of the tool tip to appear when the mouse pointer is moved from one tool tip region to another. When the AutomaticDelay is set, the AutoPopDelay is automatically set to 1/5 of the value of the AutomaticDelay, although it can be overridden. You can see that making of documentation can be very long and for many developers boring task. Fortunately, there are some add-ins for Visual Studio and HTML Help Workshop, like Help Generator, which can do a lot of work automatically. After Help Generator generate main Help framework, you just edit the files where needed through its editor. Tutorial toolbar: Tell A Friend | Add to favorites | Feedback | |