

Products
Database Search Solution (New Version) Search Control SEO Pager Highlighter Shortcut Controls Crypt Package Free ASP.NET Controls
Geotargeting Component ASP.NET Media Player Control Flash Video Player Control Services
ASP.NET Telecommute Jobs Free IP Location Lookup Test .Net Regular Expressions CSS/Table/DIV Page Layouts Custom Programming Article Sites Master List |
Introduction To AssembliesAn assembly is a single deployable unit that contains all the information about the implementation of classes, structures and interfaces. An assembly stores all the information about itself. This information is called metadata and includes the name and version number of the assembly, security information, information about the dependencies, and a list of the files that constitute the assembly. It is the assembly manifest. All the applications developed using the .NET Framework are also made up of assemblies. Namespaces are also stored in assemblies. Assemblies and the metadata provide the CLR with the information required for executing an application. For example, if an application uses a component, the assembly keeps track of the version number of the component used in the application. The assembly provides this information to the CLR while the application is being executed. Assemblies also play an important role in deployment and versioning. Assembly can comprise of one or more than one code files, which can be in any programming language. But Visual Studio doesn't permit this, it permits only one code file. An assembly file has an extension of .dll or .exe. an application in the .NET framework consists of one or more assemblies. An assembly is self descriptive and consists of :
Every application has its own assembly unlike the DLL which was used before the advent of assemblies. DLL was used to share libraries of code. You must have to register to a DLL if it is not developed by you. Whereas in ASP.NET, the assembly is automatically created. Types of AssembliesSingle and Multi-File AssembliesThere are several ways to group the various elements in an assembly. You can group all elements (manifest, MSIL and resources) in a single physical file or group them separately in several files. An assembly that groups all elements in a single file is called a single file assembly, whereas the assembly that groups its elements in multiple files is called a multi-file assembly. A single-file assembly can be created by compiling the application in Visual Studio .NET. The Visual Studio .NET IDE for Visual Basic can only be used to create single-file assemblies. Multifile assemblies can be created using command-line compilers. Private and Shared AssembliesPrivate assemblies are those assemblies that are accessible only to the applications residing in the same directory as that of the assembly. When you create an assembly, it is private by default. No other application can make use of private assembly. For a private assembly to be accessible by more than one application, you must copy the files of the assembly separately into the folder in which the other application resides. Shared assemblies are assemblies added to the GAC (Global Assembly cache). GAC is used to store assemblies and to share them between multiple applications. IN the shared system, the names of the assemblies should be unique as it can be accessed by all applications. The newer versions of the component should also have unique names. These can be achieved by using a strong name for the assembly. A shared assembly is placed in the GAC folder that is reserved for shared assemblies. Note: Sharing an assembly and installing it to the GAC requires your assembly to be signed with a strong name. Creating Strong named AssembliesA strong name uniquely identifies an assembly. It conatins information about the assembly, such as its name, version number, culture information (if any), and the public key of a public/private key pair. To sign an assembly with a strong name, you must have access to a public/private key pair. If you do not have a key pair, you can generate it with the strong naming utility (sn.exe) To create strong-named assembly, the following steps should be performed:
Calling a Strong Named AssemblyYou can create an application that needs to reference a strong named assembly. To add a reference to the strong named assembly in your project, the following steps need to be performed:
Installing Assemblies to the GACGAC is a machine wide code cache that is used to store assemblies that are created to be shared by multiple applications. You need to assign a strong name to the assemblies before adding it to the GAC. An assembly can be added to the GAC by using the following methods:
By adding assemblies into the GAC, it is possible to share the assembly across any application that requires the assembly. In addition, the assemblies are secured against unauthorized access because the assemblies that are added in the GAC can be deleted only by persons having the required rights. Moreover, it is also possible to store multiple copies of the same assembly with different version numbers in the GAC. The syntax for adding an assembly using gacutil.exe is: gacutil [options] [assemblyname] Some of the options that are used in the above command:
Version Information in an assemblyMultiple versions of an assembly can exist because a new version of the component is created every time a component is registered. The version number of the assembly is divided into four parts. They are:
Example, a version number is like: 6.3.0.2 The major and minor version numbers, the build number, and the revision number together will help to identify the latest version of the component. The version information of an assembly is stored in the identity section of the manifest. You use this section to uniquely identify the assembly. To view the contents of the manifest for a particular assembly, you can use the ILDisassembler (ILdasm.exe). ILdasm.exe is part of the .NET framework SDK. To view the assembly contents type the following at the command prompt of Visual studio .net (Start->all programs->Microsoft Visual Studio .NET 2003->Visual Studio .NET tools->Visual Studio .NET 2003 Command prompt) ildasm <assembly name> If you do not know the assembly name write: <ildasm> and from the ildasm window, select File->open. It is to note that your assembly of your application is in the bin folder. To open this navigate through the wwwroot and open your application and /bin folder. Ildasm window looks as below: 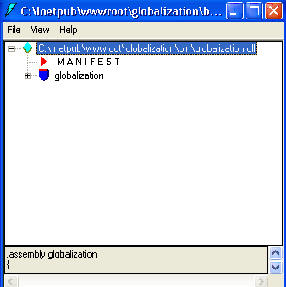 To view the manifest information, double click the manifest in the ildasm window. The assembly metadata is shown in the window: 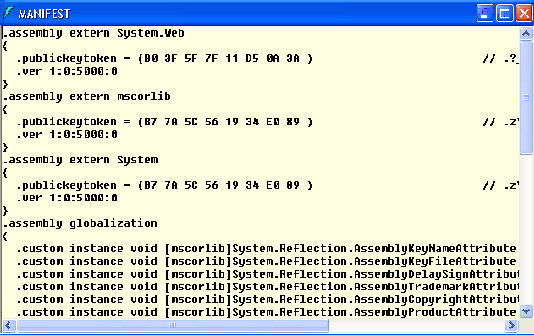 Protection of assembliesYou need to know that assembly can be easily decompiled. You can do that with some of many free .Net decompilers. On that way, if your users have access to your binary files (exe or dlls), they also have access to your source code. At Bean Software, we chose Spices.Net to protect all assemblies (applications and custom controls). Even if you can't afford complete Suite, it is recommended to get at least their Obfuscator for security reasons. Tutorial toolbar: Tell A Friend | Add to favorites | Feedback | |