|
Products
Database Search Solution (New Version) Search Control SEO Pager Highlighter Shortcut Controls Crypt Package Free ASP.NET Controls
Geotargeting Component ASP.NET Media Player Control Flash Video Player Control Services
ASP.NET Telecommute Jobs Free IP Location Lookup Test .Net Regular Expressions CSS/Table/DIV Page Layouts Custom Programming Article Sites Master List |
Taskbar Application in .NETIn this article I will explain how to remove main form dependency in .net applications and loading your program into the taskbar - like MSN Messenger and the other applications that you usually use in your daily life. The first thing we will do to create a Taskbar Application is to modify the application so that it no longer depends upon the main form, but rather creates a notify icon when it starts. It is better to create a separate class for the startup code. In this class we'll be checking for multiple instances, creating the notify icon, etc. Let's start off by checking for multiple copies of your application. A typical solution is to use Mutex to prevent running multiple copies in the first place. What happens in this solution is that the first instance of the application creates a lock on the mutex and keeps it locked as long as the application runs. Subsequent copies attempt to acquire the lock, fail and exit. Thus no other instances of the application will start an instant is running.
Public
Shared Sub
Main() That covered, let me quickly cover themes. When you start the application from a class you'll need to enable Windows XP style theme for your forms. Otherwise they will have a classic windows look and feel. The .Net Framework makes this really simple; all you need to is call EnableVisualStyle in the Application. Application.EnableVisualStyles() After checking for multiple instances and setting visual styles, we will create the notify icon and then run the main message loop. Running an application without a form is almost the same as running it with a main window - only 2 changes are required. Instead of making the call Application.Run(FormName) we make a call to Application.Run(), i.e. without any form parameter, starting the message loop without any main form. The second change is to handle the SessionEnded event. When the user logs off Windows while the application is running, Windows will request that the application to exit by raising the SessionEnded event. If we don't handle this event or don't respond to the event, Windows will assume that the application crashed. This will result in a dialog to the users telling them that the application is not responding and will request to terminate it. So in order to avoid getting that message, you need to close your application when this event is raised.
AddHandler
Microsoft.Win32.SystemEvents.SessionEnded, _ The code above will attach the event handler.
Private
Shared Sub
SystemEvents_SessionEnded(_,_) In the code above, MainWindow is a local instance of the form that is being currently displayed. Since this is a TaskBar application, we have to check if a form is being displayed, and if it exists, we close it. AppIcon is the Notify Icon. We remove that from the Taskbar and close the application calling Application.Exit. Let us now create our Notification Icon. Add an object of type NotifyIcon. This is found in System.Windows.Forms. Name it as AppIcon (as used above in the SessionEnded event handler). Add an icon to the project and then write a method to initialize the notify icon and call that method from the main before starting the application message loop.
Private
Shared Sub
InitializeNotifyIcon(ByVal iconLocation
As String) We pass in the Icon Name to the method, which initializes our AppIcon object and sets the icon to the one we set, and makes it visible. The important part is adding the context menu to the notification icon and handling mouse events. In the code above we add to MenuItems; Open and Exit, and add respective event handlers. You would also notice that there is another MenuItem "-" that is added between Open and Exit. This is a non-clickable line that'll appear in the context menu. After adding the context menu to the AppIcon object, we set our taskbar icon's text - that'll appear when the user hovers the mouse over it, and add an event handler to handle double click on the icon. The next step is to create our Event Handlers. Let us write a method to show the main application form.
Private
Shared Sub
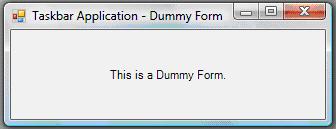
ShowApplication() This function checks to see if we've initialized our main form previously, if we've done so, then it simply sets its visible property to True, otherwise it initialized the main form and loads it using Form.Show() method. We will make a call to ShowApplication from our event handlers for the Open command on the Context Menu as well as in the Event Handler for the Double Click on the notify icon. The code for the Exit command is the same as that used in SessionEnded event handler. That's all there is to it! So let's test our application.
Using Timer control you can periodically check various things and display more notification icons; like when outlook checks e-mails and displays a message notification in the taskbar when a new mail arrives. Furthermore you can add more items to the Context Menu allowing user full customizability from the taskbar. This is all for now. I hope you enjoyed the article as much as I did explaining it. You can download sample Taskbar Application Visual Studio .NET project, used in this tutorial. Tutorial toolbar: Tell A Friend | Add to favorites | Feedback | comments powered by Disqus |


