Products
Database Search Solution (New Version) Search Control SEO Pager Highlighter Shortcut Controls Crypt Package Free ASP.NET Controls
Geotargeting Component ASP.NET Media Player Control Flash Video Player Control Services
ASP.NET Telecommute Jobs Free IP Location Lookup Test .Net Regular Expressions CSS/Table/DIV Page Layouts Custom Programming Article Sites Master List |
Build Notepad ASP.NET Web ApplicationWhat is this all about?Regardless being a real world application tutorial, this tutorial is intended to collect the information you need to write a complete typical web application in one place. You may wonder what is the motivation that leads us to write such a tutorial? If you collectively viewed most of the tutorials we presented to you up to now, you will notice why! Most of these tutorials deal specifically with a single aspect of web development. Such class of tutorials typically concentrates on providing examples that are highly relevant to the area they are exploring, and this is what we are going not to do in the tutorial you are reading now! Our main concern in this tutorial is to show you how the puzzle pieces are put together to form a real world web application. The application itself is not the matter here, what we really need you to concentrate on is How things are put together! Our layoutTo properly cover the matter and successfully achieve the target of this tutorial, we will split it into two parts. You are now reading Part 1 and you can find Part 2 here. The application source code itself can be downloaded from here. Please note that you will need to do a small change to the 'web.config' file to make it more useful for your environment (specially the SQL server name). The underlying back end Microsoft SQL database is included with the example files for your convenience. You will, of course, need to attach that database to your SQL server under the name 'Notepad'. This is the name that our application assumes by default. Some issues are not addressed deeply or entirely ignored due to either their irrelevance or the purpose of maintaining a clear and smooth understanding or the problems we are addressing. For example, the security related modules, and the new user registration screen of our application are treated with little attention to give more weight to the main purpose of this tutorial. Although in a real world application developers typically do not show the ID's of their database tables records, we deviated from this fact to aid you while you are tracing the relations between the the screens we will provide and the actual underlying database tables. You are a user not a developer now!Those of you with background about modeling systems using UML (Unified Modeling Language) know well the importance of the 'Functional Model'. This type of models focuses on how the end user sees the final web application. We will proceed with this scheme and will show you first how the application will behave from the point of view of the end user. The main target of this application is to simulate the behavior of the famous Microsoft Windows text editor 'Notepad'. This replication is implemented on the web so that people using this application can open their web browser and use it as a text editor. The fact that this is a web not a desktop application automatically suggests a set of features for the web Notepad:
Let's illustrate a typical usage scenario of the application by the aid of some figures:
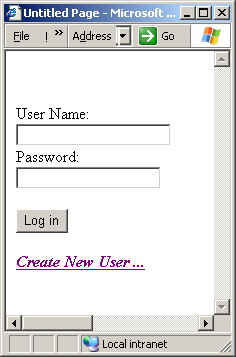
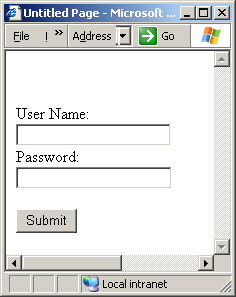
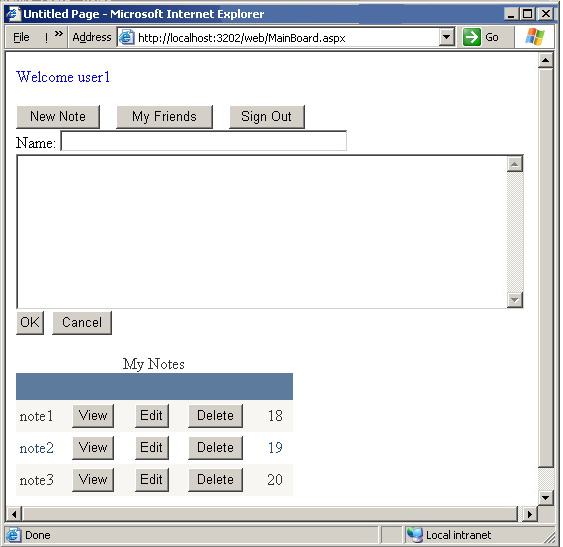
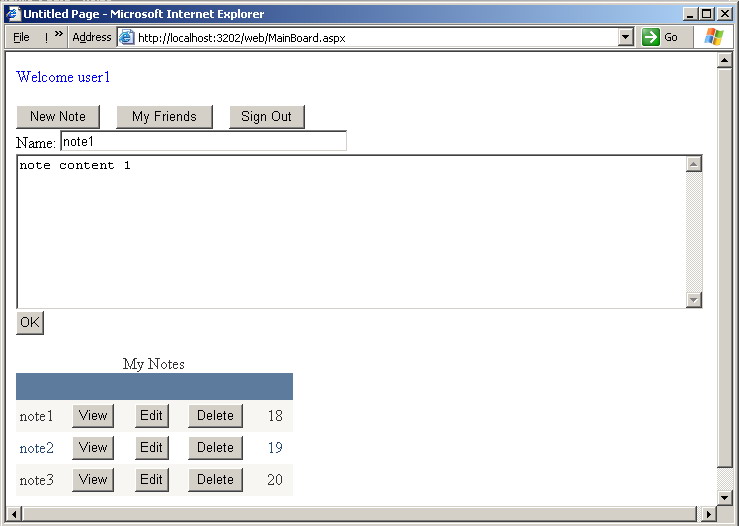
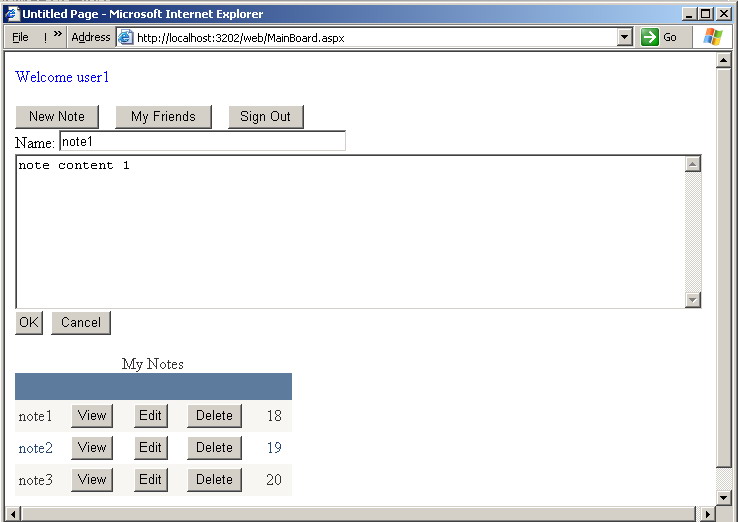
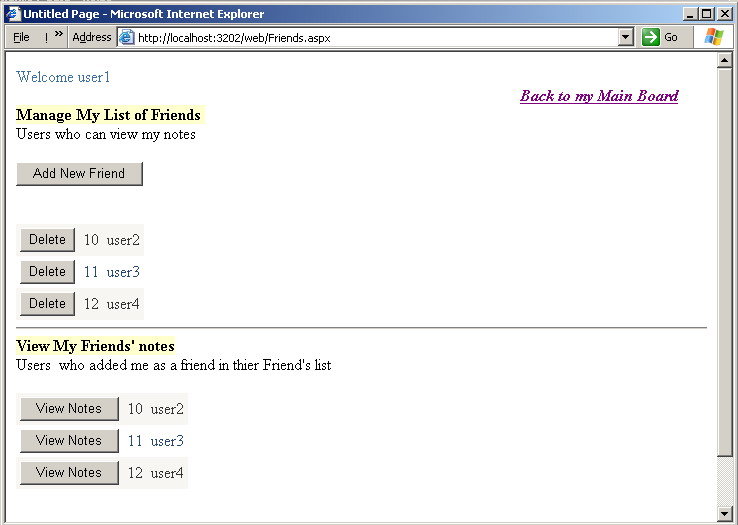
The end user is first presented to a login screen in which he can enter his user name and password (figure 1). From there he can enter the sign up screen as well (figure 2). After login, the user can see all his notes (figure 3). By clicking the 'New Note' button, the user can add a new text file to his notes set (figure 4). He can view any previously stored note (figure 5), or edit any already existing note and re-save it (figure 6). The end user can see a list of his friends that are allowed to view his notes (figure 7) where he can add to or delete from them. He can see a list of his friends who allowed him to view their notes (figure 7 again) where he can click any friend to see his notes (figures 8 and 9). After this functional model, you are now ready to explore some high level design issues like the database design. The back endOur database is hosted on a Microsoft SQL server. The database consists of 3 tables: Users, Friends, And Notes. The Users table is intended to store information about the web application users like their names and passwords. The Friends table stores information about who is the friend of who. Every user has his list of friends stored in this table. The last table, the Notes table, stores the notes themselves. Every note has it's text, title, and associated user stored. Figure 11 is a high level illustration of the hierarchy of the entire database of our web application.
The following table will aid you in understanding the rule of every field in this database:
What's next?To properly cover the matter and successfully achieve the target of this tutorial, we will split it into two parts. You are now reading Part 1 and you can find Part 2 here. For further informationRefer to the online copy of Microsoft Developers Network at http://msdn.microsoft.com or use your own local copy of MSDN. Tutorial toolbar: Tell A Friend | Add to favorites | Feedback | |